

Google Address Validation API Documentation: Setup Guide
If you're building a fintech application, whether it handles hardware wallet shipments, KYC verification, or any service where accurate user addresses matter, the Google Address Validation API documentation is your starting point. Getting address data right isn't optional when financial products and physical security devices are on the line. A single misrouted package containing a hardware wallet can create both a customer service headache and a real security risk.
At FinTech Dynasty, we deal with the practical side of crypto security every day, and that includes the infrastructure behind getting wallets and verified services into the right hands. Address validation sits at the intersection of user experience and operational security, two things our audience cares about deeply.
This guide walks you through the full setup process, from enabling the API in Google Cloud Console to making your first validation request and handling response data. You'll get the technical steps, code examples, and implementation details needed to integrate address validation into your own project without guesswork.
What the Address Validation API does
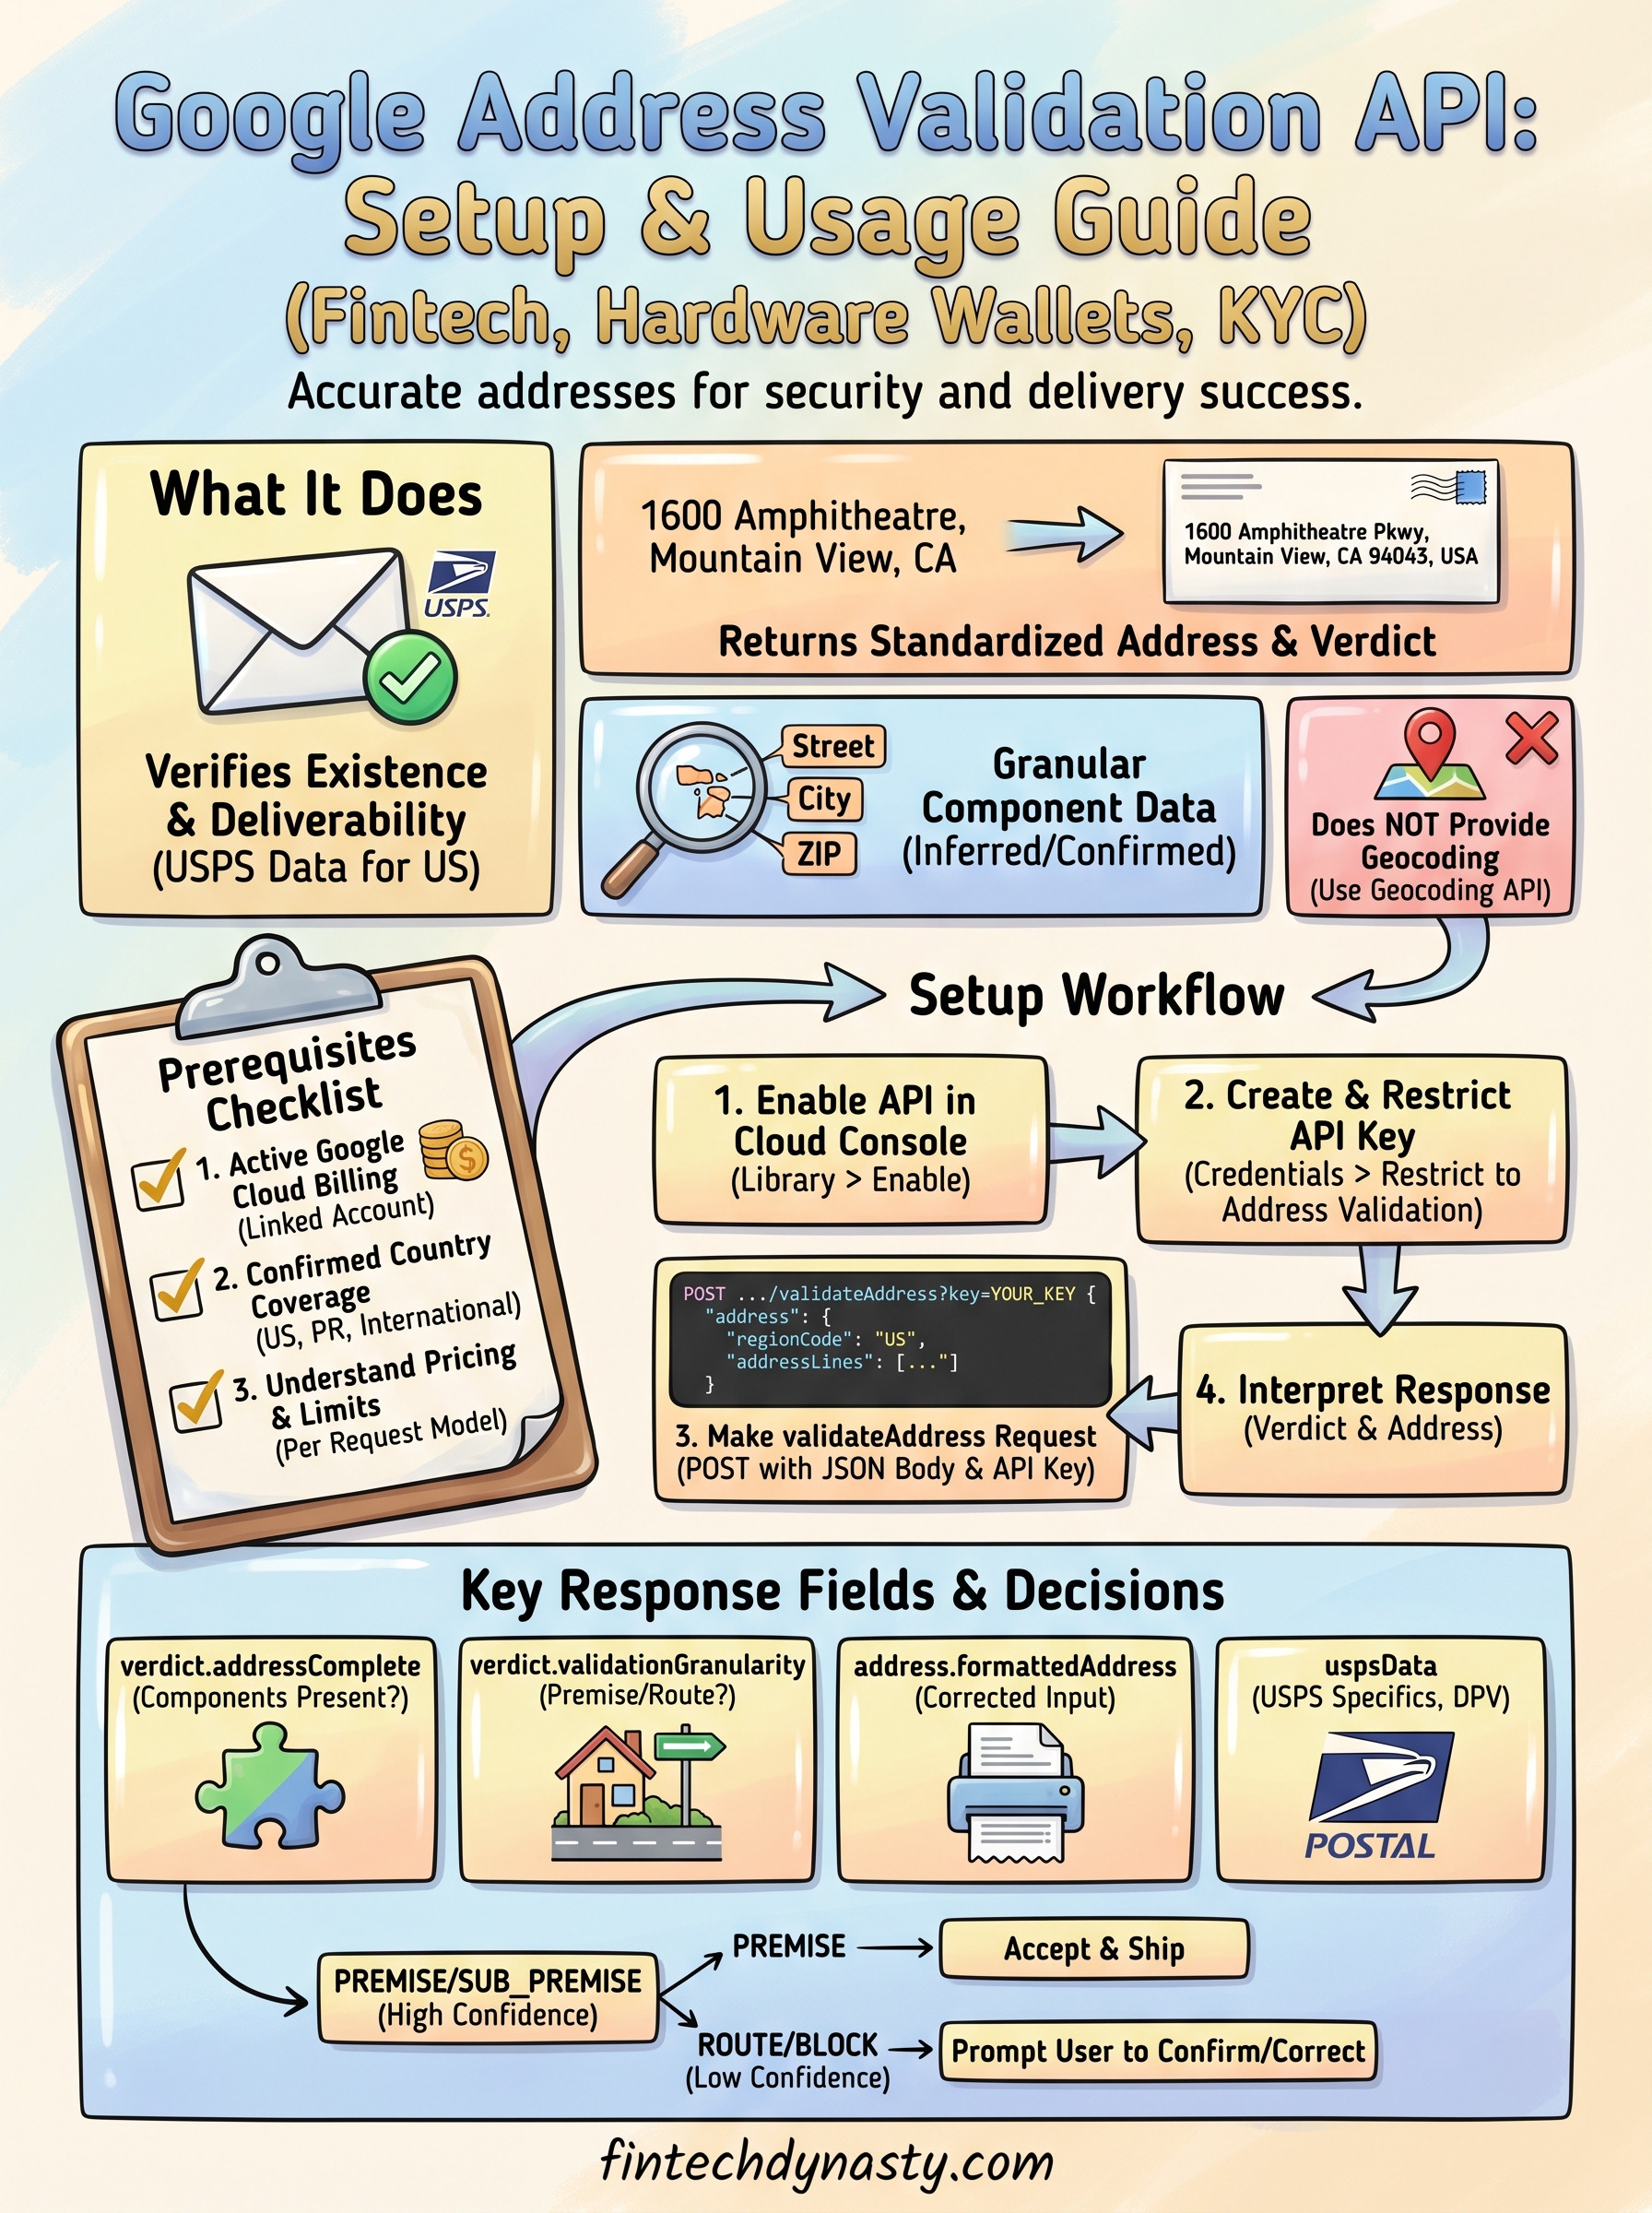
The Google Address Validation API is a REST-based service that takes a raw address string and returns a structured, corrected result checked against postal authority databases. For US addresses, it cross-references USPS data directly, which means you get back not just a formatted address but a confirmation of whether that address is real and deliverable. If your application ships physical goods or needs a verified billing address, this API removes the ambiguity that comes from free-form user input.
Core validation capabilities
The API does more than basic formatting. When you send a request, it processes the input against its internal datasets and returns a verdict object that tells you exactly how confident the service is in the result. It also returns a standardized address in the correct postal format for the country in question, along with granular component-level data showing which parts were inferred, corrected, or confirmed.
Here is a breakdown of the key response fields you will work with:
| Field | What it tells you |
|---|---|
verdict.addressComplete |
Whether all required address components are present |
verdict.validationGranularity |
How precise the match is (PREMISE, ROUTE, etc.) |
address.formattedAddress |
The corrected, standardized version of the input |
address.addressComponents |
Each component with its individual confirmation level |
uspsData |
USPS-specific data for US addresses, including DPV confirmation |
The
verdict.validationGranularityfield is one of the most actionable signals in the response. A result ofPREMISEconfirms the specific building or unit, whileROUTEonly confirms the street, which is a meaningful difference if you are shipping a high-value item.
What the API does not do
Understanding the limits matters as much as knowing the features. The Address Validation API does not provide geocoding as a primary output, meaning it will not return latitude and longitude for routing or mapping purposes. For that, you need a separate call to the Geocoding API. The validation API is purpose-built for confirming whether a postal address exists and is deliverable, not for plotting it on a map.
According to the official Google Maps Platform documentation, the API currently supports addresses in the United States, Puerto Rico, and a growing list of international regions. Before you integrate, verify that the countries you need are in the supported list, especially if your application handles international shipments or serves users outside the US.
How the API fits into the address verification workflow
For most fintech and e-commerce implementations, the Address Validation API sits between your address input form and your order processing or KYC system. A user enters their address, your backend sends it to the API, and you either accept the corrected result or prompt the user to confirm a suggested fix before proceeding. This exact pattern is documented in the google address validation api documentation under the "Address Validation workflow" section on the Maps Platform developer site.
Your application sends one POST request per address, evaluates the verdict, and then decides what action to take next. If the address comes back as unconfirmed or incomplete, you surface a correction prompt rather than letting the order proceed with bad data. This keeps your shipping success rate high and reduces the risk of a hardware wallet reaching the wrong destination.
Prerequisites: billing, coverage, and limits
Before you write a single line of code, you need three things in place: an active billing account, confirmed coverage for your target countries, and a clear picture of the API's usage limits. Skipping these checks upfront will cost you time when your requests fail or return unexpected results in production.
Set up billing in Google Cloud
The Address Validation API is a paid service, which means your Google Cloud project must have an active billing account attached before the API will process any requests. If you already use other Google Maps Platform APIs, your billing account may already be linked, but you should confirm this before enabling the Address Validation API specifically.
Google provides a $200 monthly credit for Maps Platform usage, which at current Address Validation pricing covers roughly 40,000 validation requests per month at no cost.
To attach billing, go to the Google Cloud Console billing page and either create a new billing account or link an existing one to your project. You will need a valid payment method on file even if you plan to stay within the free tier.
Check country coverage
The Address Validation API does not support every country, and the list of supported regions continues to expand. For US-based applications, you are fully covered, including Puerto Rico and USPS DPV confirmation. For international use cases, you need to verify your target countries against the official supported regions list before building your integration.
Check the Address Validation coverage page in the google address validation api documentation to see the current list. Countries outside the supported set will return a response with a low confidence verdict, which can mislead your validation logic if you are not handling it correctly.
Understand request limits and pricing
Pricing for the Address Validation API is based on a per-request model. Here is what you need to know before you go to production:
| Usage tier | Price per 1,000 requests |
|---|---|
| 0 to 100,000 per month | $5.00 |
| 100,001 to 500,000 per month | $4.00 |
| 500,001+ per month | Contact Google for volume pricing |
Set up billing alerts in Google Cloud so you receive a notification before you exceed your intended budget. You configure these under Billing > Budgets and Alerts in the Cloud Console.
Step 1. Enable the API and create an API key
Before your application can send a single validation request, you need to enable the Address Validation API in Google Cloud Console and generate an API key scoped to that service. This takes about five minutes, but doing it correctly from the start prevents authentication errors later.
Enable the Address Validation API in Cloud Console
Log into the Google Cloud Console and select the project you want to use. From the left navigation, go to APIs and Services > Library and search for "Address Validation API." Click the result, then click Enable. If your project does not have billing attached yet, the console will prompt you to link a billing account before activation completes.

Once you enable the API, it can take up to two minutes before the service recognizes your key as valid, so do not assume your credentials are broken if the first test request fails immediately after setup.
Follow these steps in order to avoid common setup mistakes:
- Select the correct project before enabling, since keys are project-scoped
- Confirm billing is active on that same project
- Enable the Address Validation API specifically, not just the Maps Platform umbrella
- Wait for the confirmation banner before generating your key
Create and restrict your API key
Navigate to APIs and Services > Credentials and click Create Credentials > API key. The console generates a key immediately. Copy it before you close the dialog. Next, click Edit API key and restrict it to the Address Validation API only. This limits the blast radius if the key is ever exposed. You should also add application restrictions such as IP address restrictions for server-side implementations.
Store the key in an environment variable, not hardcoded in your source files. The pattern below works for most backend setups:
# Store in your environment
export GOOGLE_MAPS_API_KEY="your_api_key_here"

# Reference it in your application
API_KEY = os.environ.get("GOOGLE_MAPS_API_KEY")
The full key management guidance is covered in the google address validation api documentation under the Authentication section of the Maps Platform developer site. Following that guidance keeps your key secure and your billing protected from unauthorized use.
Step 2. Make a validateAddress request
With your API key in place, you are ready to send your first request. The validateAddress endpoint accepts a POST request with a JSON body containing the address you want to check. The base URL for every call is https://addressvalidation.googleapis.com/v1:validateAddress?key=YOUR_API_KEY. You pass the address as a structured object inside the request body, and the API returns a full validation result.
Structure the request body
Your request body needs an address object with at least one address field populated. The most reliable approach is to pass the address as structured components rather than a single raw string, because structured input gives the API clearer signals and returns higher-confidence results. Here is a complete example in Python using the requests library:
import requests
import os

API_KEY = os.environ.get("GOOGLE_MAPS_API_KEY")
url = f"https://addressvalidation.googleapis.com/v1:validateAddress?key={API_KEY}"

payload = {
    "address": {
        "regionCode": "US",
        "addressLines": ["1600 Amphitheatre Pkwy", "Mountain View, CA 94043"]
    }
}

response = requests.post(url, json=payload)
print(response.json())
Pass
regionCodein every request. Without it, the API infers the country from the address string, which reduces accuracy and can return unexpected results for ambiguous inputs.
Use cURL for quick testing
Before writing any application logic, testing with cURL lets you verify your key is active and see a raw response immediately. Run the command below in your terminal and replace the placeholder with your actual key:
curl -X POST \
  "https://addressvalidation.googleapis.com/v1:validateAddress?key=YOUR_API_KEY" \
  -H "Content-Type: application/json" \
  -d '{
    "address": {
      "regionCode": "US",
      "addressLines": ["1600 Amphitheatre Pkwy", "Mountain View, CA 94043"]
    }
  }'
Handle the previousResponseId field
For multi-step flows where you show a correction suggestion and ask the user to confirm, include the previousResponseId value from your first response in the follow-up call. This tells the API that your application is part of a confirmation workflow rather than generating duplicate requests, which matters for accurate billing and usage tracking. The full request schema, including all optional fields, is covered in the google address validation api documentation on the Maps Platform reference page.
Step 3. Interpret responses and ship safely
The API returns a rich JSON object, and knowing which fields to check first saves you from building fragile logic around the wrong signals. Your goal is to translate the response into a clear decision: accept the address, prompt the user to confirm a correction, or block the submission entirely. The google address validation api documentation breaks down every response field, but this section focuses on the subset that drives real shipping decisions.
Read the verdict object first
Every response contains a verdict object that summarizes the overall confidence in the address. Check verdict.validationGranularity and verdict.addressComplete before you look at anything else. If addressComplete is false, a required component is missing, and you should not let the order proceed without asking the user to supply the missing piece.
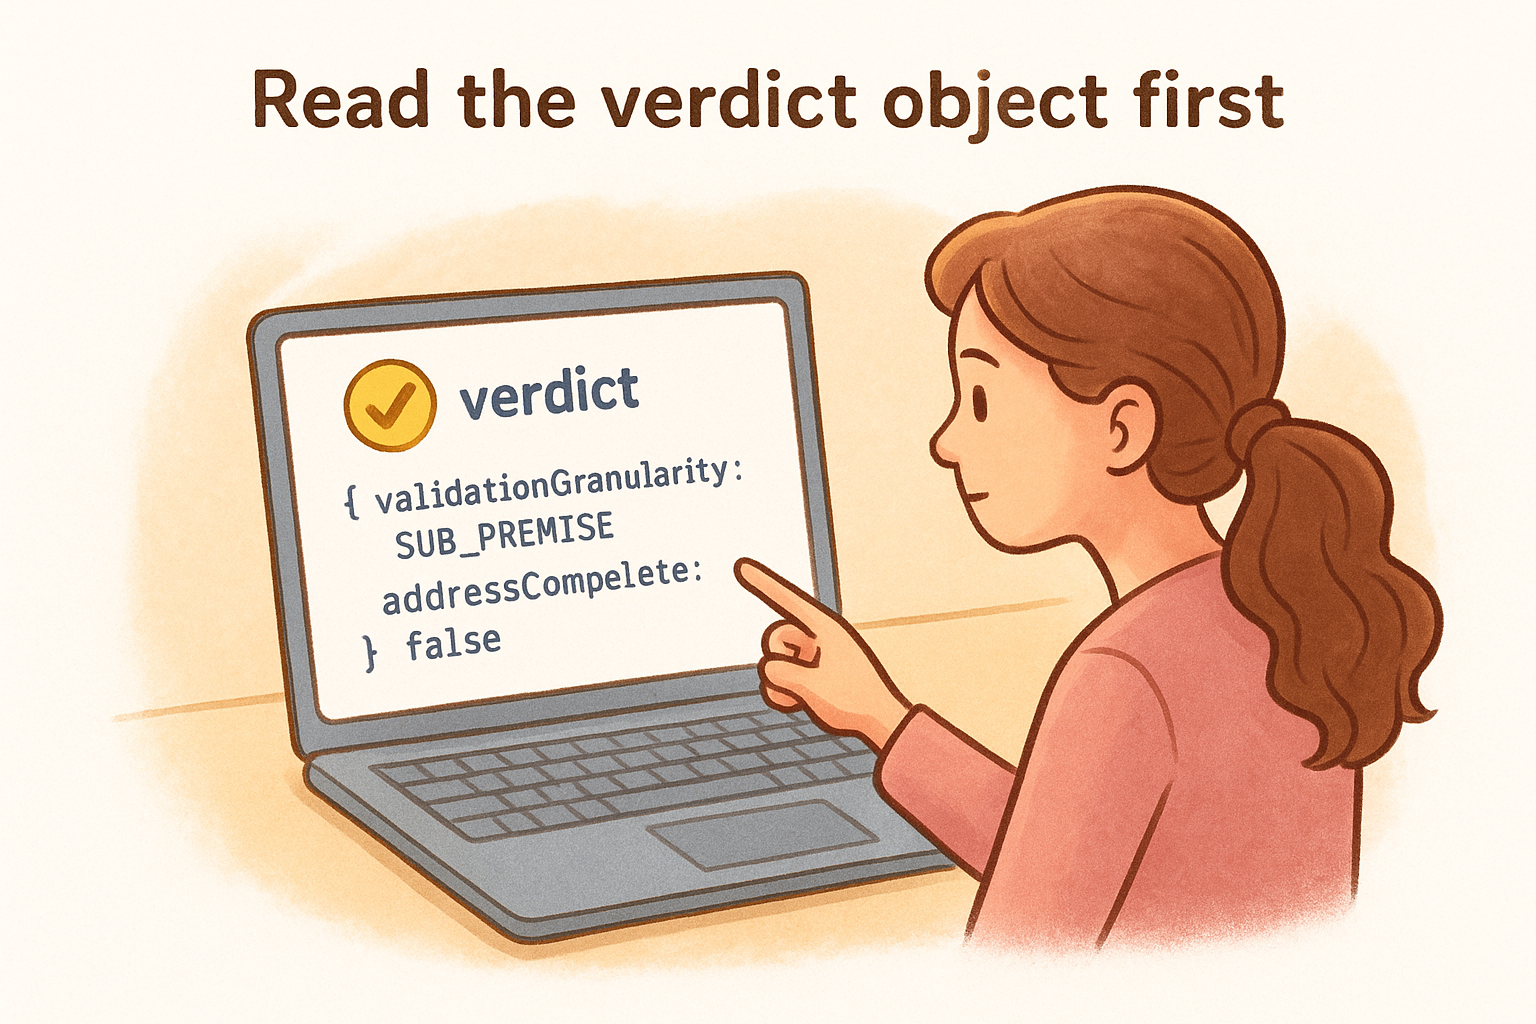
A
validationGranularityofSUB_PREMISEis the highest confidence level you can get for US addresses, confirming a specific unit or apartment within a building.
Here is a Python snippet that reads those two fields and returns a simple action string:
def evaluate_verdict(response_json):
    verdict = response_json.get("result", {}).get("verdict", {})
    granularity = verdict.get("validationGranularity", "GRANULARITY_UNSPECIFIED")
    complete = verdict.get("addressComplete", False)

    if not complete:
        return "PROMPT_USER"
    if granularity in ["PREMISE", "SUB_PREMISE"]:
        return "ACCEPT"
    return "REVIEW"
Map granularity levels to shipping decisions
Not every granularity level warrants the same response from your application. Use this table as a starting point for mapping API output to your fulfillment workflow:
validationGranularity value |
Recommended action |
|---|---|
SUB_PREMISE or PREMISE
|
Accept and ship |
ROUTE |
Prompt user to confirm or add unit number |
BLOCK or lower |
Block submission, request re-entry |
GRANULARITY_UNSPECIFIED |
Treat as unverified, flag for manual review |
Handle corrected address suggestions
When the API returns a formattedAddress that differs from the user's input, surface that corrected version to the user with a clear confirmation prompt before finalizing anything. Store both the original input and the corrected version in your database so you have an audit trail. Pull the corrected string directly from result.address.formattedAddress and display it inline next to the original so the user can confirm the change without retyping the whole address.
Final checklist
You now have everything you need to move from reading the google address validation api documentation to running a working integration. Before you push anything to production, run through this list to confirm your setup is solid.
- Billing account is active and linked to your Cloud project
- Address Validation API is enabled in APIs and Services
- API key is restricted to the Address Validation API only
- Key is stored in an environment variable, not hardcoded
-
regionCodeis included in every request body - Your code reads
verdict.addressCompletebefore accepting an address - Correction prompts surface
formattedAddressto users when input differs -
previousResponseIdis passed in follow-up confirmation calls - Billing alerts are configured in Cloud Console
Shipping a hardware wallet to the wrong address is a security problem, not a logistics inconvenience. If you want to go deeper on protecting your crypto assets end to end, start the FinTech Dynasty crypto education course and build a foundation that covers both digital and physical security.