

How To Use A Hardware Wallet With MetaMask (Step-By-Step)
MetaMask is one of the most widely used browser wallets in crypto, but on its own, it stores your private keys in your browser. That's a problem. If your device gets compromised, so do your funds. The fix is straightforward: learn how to use a hardware wallet with MetaMask so your keys stay offline while you still interact with dApps, DeFi protocols, and token transfers through a familiar interface.
Connecting a hardware wallet like Ledger or Trezor to MetaMask gives you the best of both worlds, the convenience of a software wallet paired with the signing security of a cold storage device. Every transaction requires physical confirmation on your hardware wallet, which means no malware or phishing site can approve a transfer without you.
Here at FinTech Dynasty, we focus on helping you understand and implement self-custody the right way, no hype, no speculation, just practical security knowledge. In this guide, we'll walk you through the full process of connecting your hardware wallet to MetaMask, step by step, so you can start using both together with confidence.
What you need before you start
Before you connect your hardware wallet to MetaMask, gather everything you need. Going in unprepared leads to frustrating stops mid-setup. You'll need a compatible hardware wallet, the MetaMask browser extension installed on a desktop browser (Chrome, Firefox, Brave, or Edge all work), and a reliable USB cable. Mobile MetaMask does not support hardware wallet connections, so stick to desktop for this process.
Download MetaMask only from metamask.io or your browser's official extension store to avoid installing a phishing clone.
Compatible hardware wallets
MetaMask works natively with a specific set of hardware wallets. Ledger (Nano X, Nano S Plus) is the most widely supported option and connects via USB or Bluetooth using the Ledger Live companion app. Trezor (Model T and Model One) connects through Trezor Bridge, a small background service you install on your computer. If you own a different brand, check whether it supports MetaMask pairing directly in the manufacturer's documentation before assuming it will work.
Here is a quick reference for the two most common setups:
| Hardware Wallet | Connection Method | Required Software |
|---|---|---|
| Ledger Nano X / S Plus | USB or Bluetooth | Ledger Live |
| Trezor Model T / One | USB | Trezor Bridge |
Software and firmware requirements
Your hardware wallet firmware must be up to date before you attempt any pairing. You can verify and update firmware inside Ledger Live or Trezor Suite. Beyond firmware, you need the Ethereum app installed on the hardware wallet itself, since MetaMask communicates directly through that app to display accounts and request transaction signatures. Without the Ethereum app active on the device, MetaMask will not detect your hardware wallet at all.
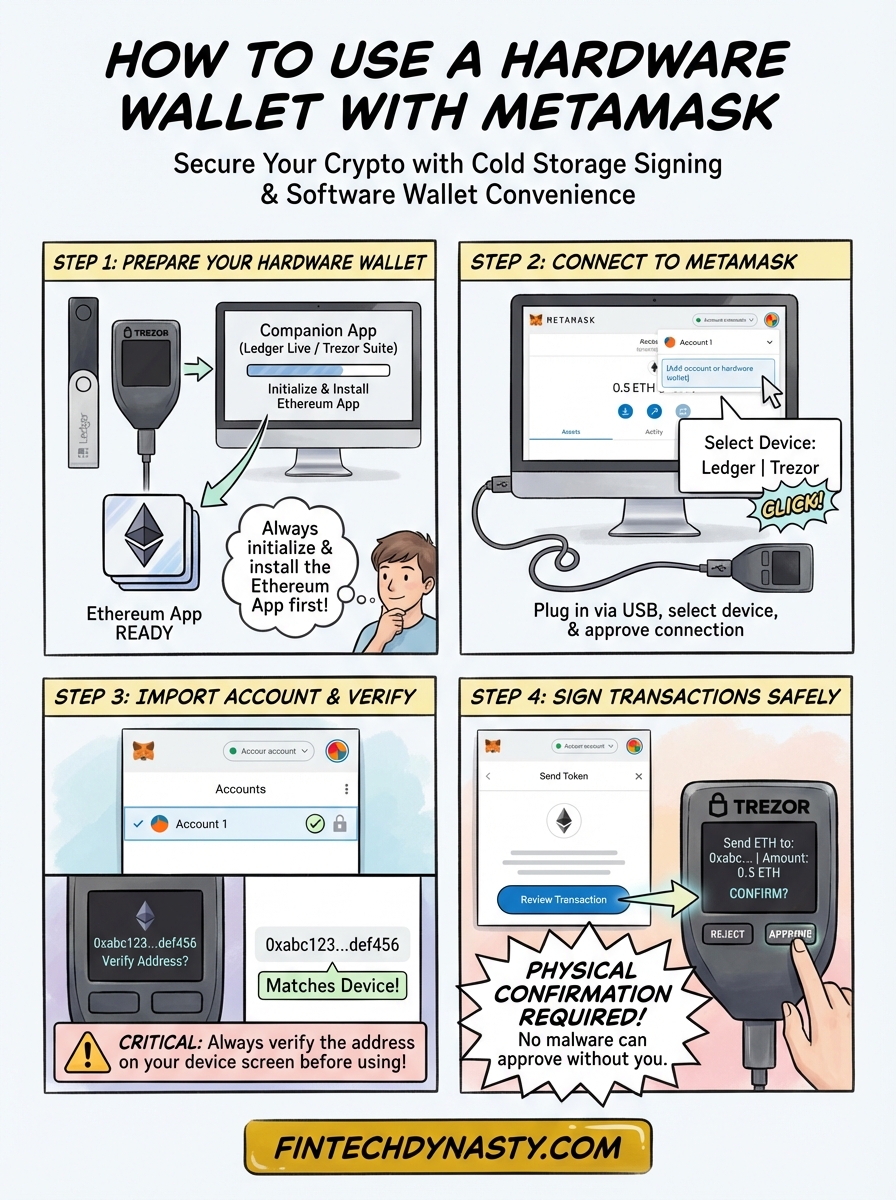
Step 1. Set up your hardware wallet the right way
Before you connect anything to MetaMask, your hardware wallet must be fully initialized and ready to sign transactions. Skipping this step and jumping straight to pairing is the most common mistake beginners make, and it causes the entire process to stall.
Initialize your device and install the Ethereum app
If you just bought your hardware wallet, follow the setup instructions from Ledger Live or Trezor Suite to generate your seed phrase and set your PIN. Write your seed phrase on paper, store it somewhere safe, and never photograph it. Once the device is initialized, open the companion app and navigate to the app manager to install the Ethereum app on your device. MetaMask communicates exclusively through that app during pairing.
Never share your seed phrase with anyone, including support staff. No legitimate service will ever ask for it.
After installing the Ethereum app, open it directly on the device so it displays "Application is ready." If you skip this step and try to connect to MetaMask with the app closed, MetaMask will fail to detect your hardware wallet entirely. Keep the app open throughout the entire pairing process.
Step 2. Connect your hardware wallet to MetaMask
With your hardware wallet initialized and the Ethereum app open, you're ready to pair it with MetaMask. This step is where learning how to use a hardware wallet with MetaMask becomes concrete: you link the two so MetaMask can read your accounts and request transaction approvals directly from the device.
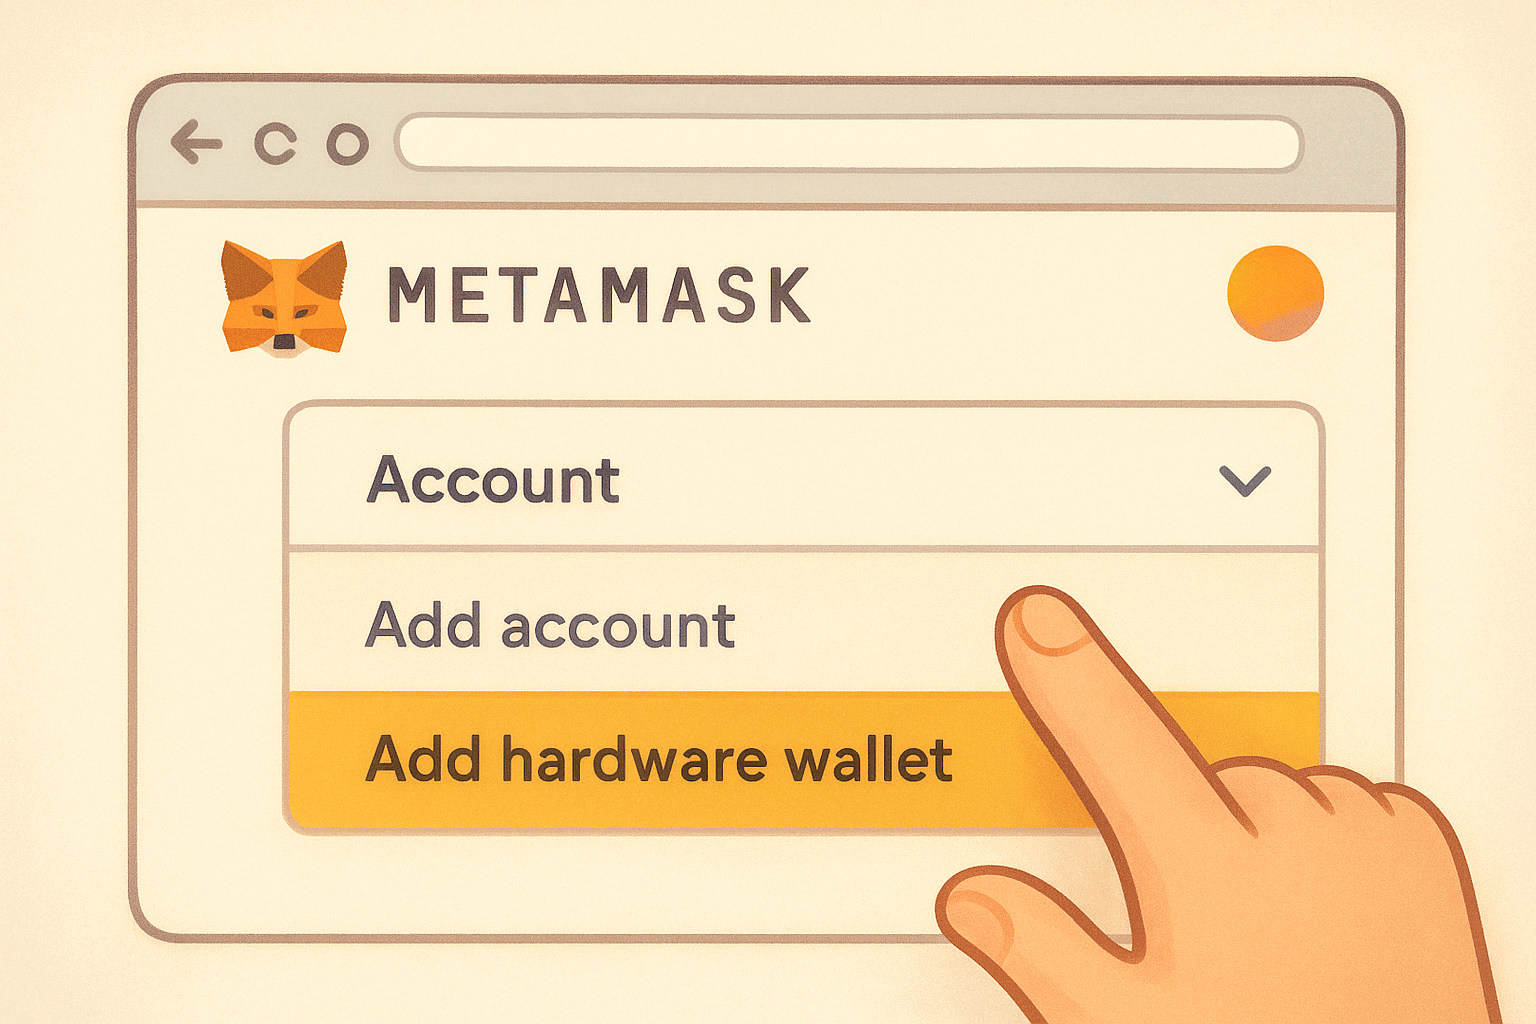
Open MetaMask and navigate to the connect option
Open MetaMask in your browser and click the account selector at the top of the extension window. Scroll to the bottom of the account list and click "Add account or hardware wallet." On the next screen, select "Add hardware wallet." MetaMask will prompt you to choose your device type.
Plug your hardware wallet into your computer via USB before clicking anything in MetaMask, or the browser may not detect it.
Select your device and approve the connection
Choose Ledger or Trezor from the options presented. MetaMask will attempt to communicate with the device immediately. For Trezor, a browser pop-up will ask you to confirm the connection on-screen. For Ledger, make sure the Ethereum app is still open and visible on the device display. Once MetaMask successfully detects your hardware wallet, it will advance to the account selection screen automatically.
Step 3. Import the correct account and confirm addresses
MetaMask will display a list of Ethereum accounts derived from your hardware wallet's seed phrase. Each one is a real, usable address, so selecting the right one matters. This is the step where learning how to use a hardware wallet with MetaMask becomes fully operational: once you import an account, it appears in your MetaMask wallet linked to your device.
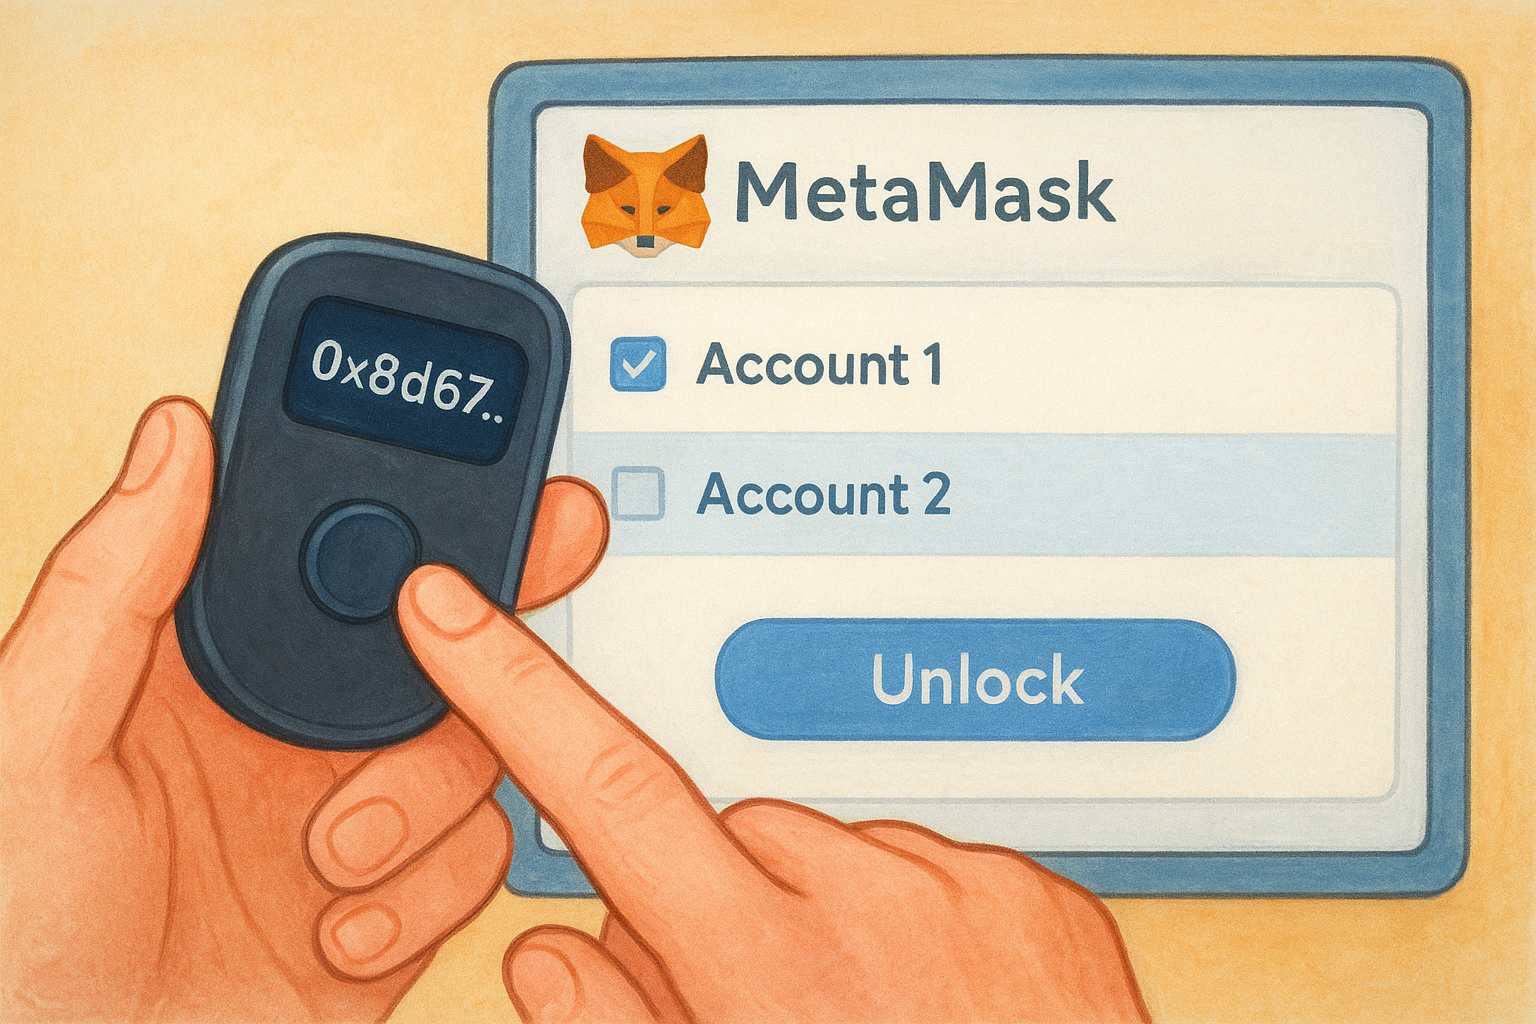
Choose the right account from the list
You'll see multiple accounts labeled Account 1, Account 2, and so on. In most cases, Account 1 is the correct choice unless you previously used a different account index on this device. Select the checkbox next to the account you want and click "Unlock." MetaMask will then add it to your account list with a small hardware wallet icon to distinguish it from software accounts.
Verify the address on your device
Before sending any funds to this account, use the address verification feature in Ledger Live or Trezor Suite to display the address directly on your device screen and confirm it matches exactly what MetaMask shows.
Never trust an address shown only on your computer screen; always verify it on the hardware wallet display before sending funds.
Both the device screen and MetaMask must show the exact same address, character for character, to rule out any man-in-the-middle interference.
Step 4. Move assets and sign transactions safely
Now that your hardware wallet account is live in MetaMask, you can send tokens, interact with DeFi contracts, and approve smart contracts through the familiar MetaMask interface. The key difference from a standard software wallet is that every transaction requires physical confirmation on your device before it broadcasts to the network.
Send a token transfer
To send ETH or an ERC-20 token, initiate the transaction in MetaMask as normal: enter the recipient address, set the amount, and click "Next." MetaMask will pause and prompt your hardware wallet to review the transaction. Your device screen will then display the recipient address and the transaction value for you to verify manually before anything is signed.
Always read the full address on your device screen before confirming; phishing attacks often swap addresses at the last second inside the browser.
Verify details before you confirm
Check that the amount and recipient address on your device match exactly what you entered in MetaMask. If anything looks different, reject the transaction on the device immediately and investigate before trying again. This physical confirmation step is the core reason to learn how to use a hardware wallet with MetaMask: no remote attacker can approve a transfer without your physical button press on the device itself.
Quick wrap-up and next steps
You now have a complete picture of how to use a hardware wallet with MetaMask. The process comes down to four concrete actions: initialize your device properly, install the Ethereum app, pair it with MetaMask over USB, and physically confirm every transaction on the device screen before it broadcasts. That final confirmation step is what separates a hardware-backed account from a standard software wallet. No remote attacker can approve a transfer without your physical input on the device.
From here, the logical next step is choosing the right hardware wallet for your specific needs. Different devices offer different security models, connection methods, and firmware track records, so spending time on that decision before you buy will save you real headaches later.
Check out FinTech Dynasty for in-depth hardware wallet comparisons, step-by-step setup guides, and downloadable security checklists built to help you protect your assets the right way.