

Blockstream Jade Multisig: Multisig Shield & 2FA Setup
Most hardware wallets give you one private key and call it a day. The Blockstream Jade takes a different approach, it lets you build a setup where multiple keys are required to authorize a transaction, which is exactly what multisig is designed to do. If you've been researching Blockstream Jade multisig capabilities, you're already thinking beyond basic single-sig security, and that's a solid move.
Multisig Shield, Jade's built-in feature, adds a second layer of authorization that functions similarly to 2FA, but at the Bitcoin protocol level, not through a third-party app. It's a practical upgrade for anyone holding meaningful amounts of BTC in cold storage. Understanding how this works before you set it up is critical, because misconfiguring multisig can lock you out of your own funds.
At FinTech Dynasty, we break down hardware wallet security so you can make informed decisions based on technical reality, not marketing promises. This guide walks you through how Multisig Shield works on the Blockstream Jade, how to configure it with compatible wallet software, and what to watch out for during setup.
How Blockstream Jade multisig works
Blockstream Jade multisig runs on the same Bitcoin protocol-level logic that all multisig wallets use. Instead of relying on a single private key to sign a transaction, a multisig setup requires a minimum number of keys from a defined group. For example, a 2-of-3 configuration means you need any two of three keys to approve a spend. The Jade acts as one of those signing devices, which means losing the Jade alone doesn't give anyone access to your funds.
The standard multisig model
In a standard multisig configuration, each signing device holds a unique extended public key (xpub), and all keys are registered together in a compatible wallet coordinator like Sparrow Wallet or Nunchuk. The wallet coordinator collects the required signatures from each device in sequence. You never expose all your private keys in one place, which dramatically reduces the risk of a single point of failure. Jade integrates with these coordinators through a straightforward process: you export the xpub, import it into the coordinator, and register the multisig descriptor back on the Jade.
What Multisig Shield adds
Multisig Shield is Jade's built-in 2FA feature that uses a Blockstream-operated validation server (called an Oracle) as a second factor. When you enable it, your Jade will only decrypt its private key after the Oracle confirms that your transaction doesn't look suspicious. The Oracle checks conditions like spending amounts and address whitelists that you define at setup.
Multisig Shield turns your Jade into a 2-of-2 configuration between the device and the server, which means both must approve before any transaction clears.
This model gives you an extra security checkpoint without requiring a second hardware device, making it a practical entry point into multi-factor Bitcoin security.
Step 1. Choose the right multisig design
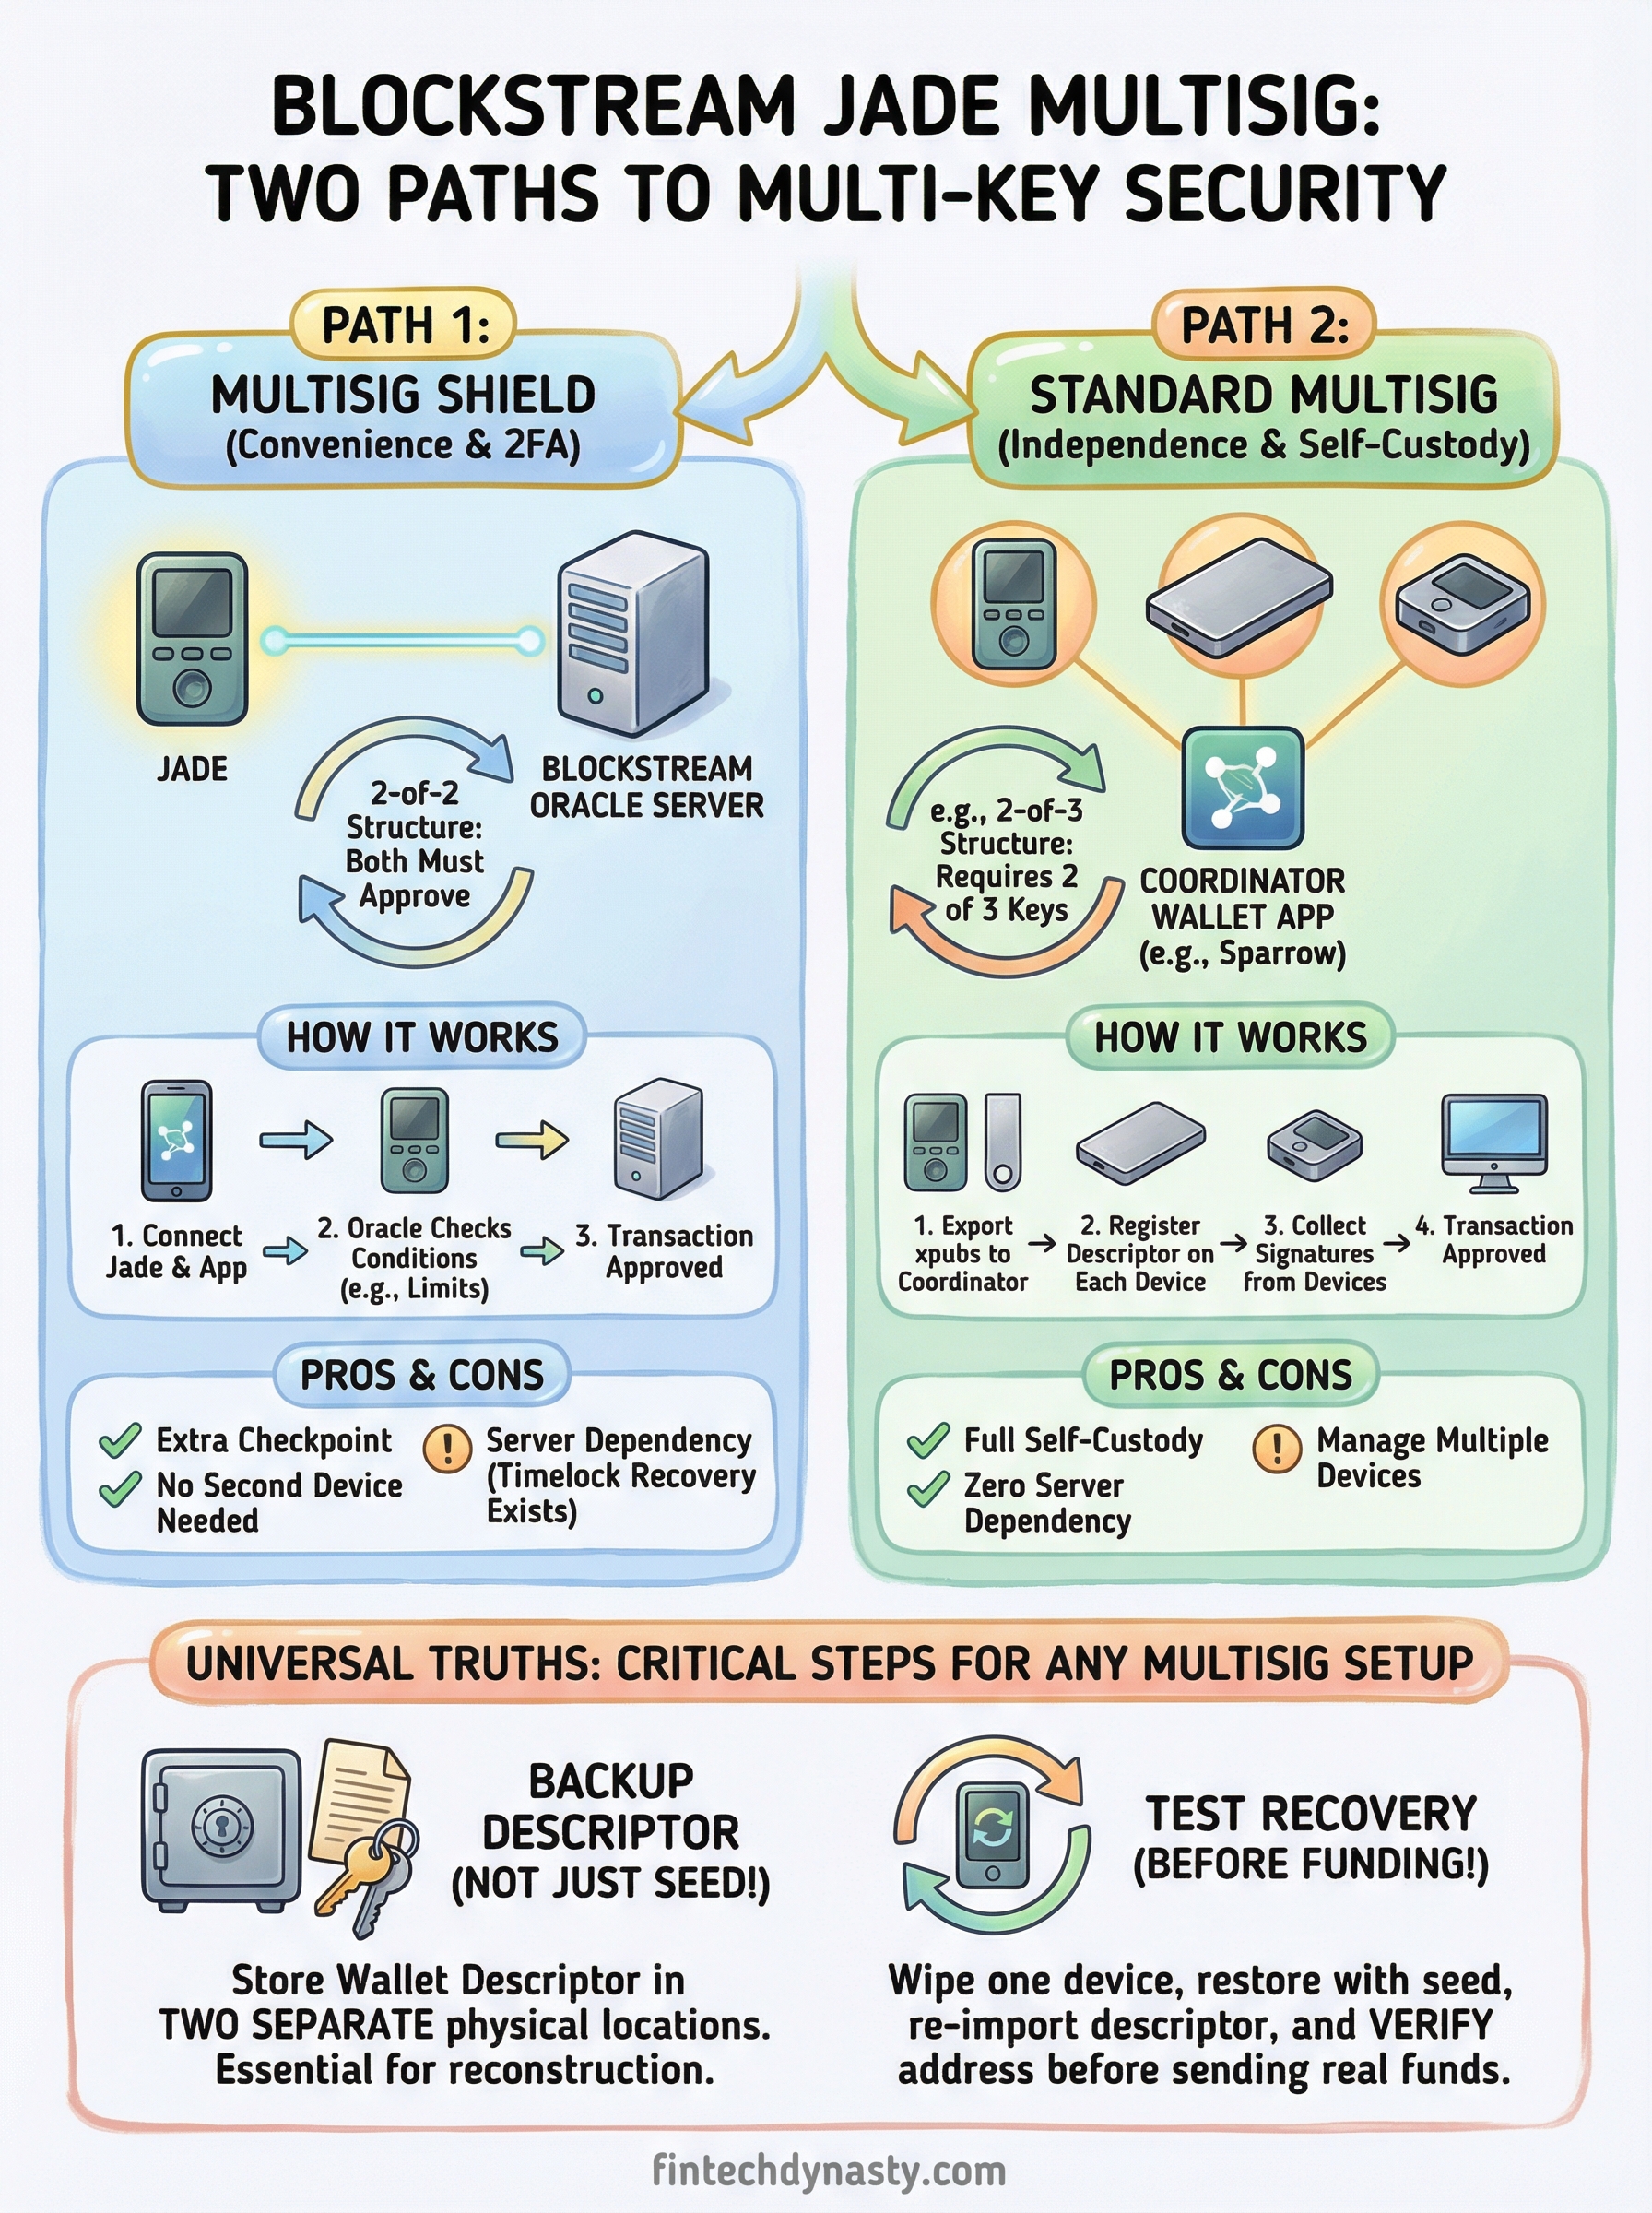
Before you touch any hardware or software, you need to decide which multisig structure fits your situation. The two main options for Blockstream Jade multisig users are: Multisig Shield (Jade plus Oracle as a 2-of-2) and a standard multisig with multiple hardware devices. Each one carries a different risk profile and recovery requirement, so getting clear on your priorities here saves you from reconfiguring everything later.
Multisig Shield vs. standard multisig
Multisig Shield is the simpler path. You use one Jade device and Blockstream's Oracle server as the second signer. This works well if you want an extra authorization checkpoint without managing multiple hardware devices. The tradeoff is that you rely on Blockstream's server being reachable when you sign transactions.
If Blockstream's Oracle goes permanently offline, Jade includes a timelock recovery mechanism that lets you access your funds without the server.
Standard multisig with multiple devices gives you full self-custody and zero server dependency. A 2-of-3 setup with a Jade plus two other hardware signers distributes risk across devices you physically control, with no external party involved.
| Setup | Signers | Server dependency |
|---|---|---|
| Multisig Shield | Jade + Oracle | Yes |
| Standard 2-of-3 | 3 hardware devices | No |
Pick Multisig Shield for convenience. Pick standard multisig for complete independence.
Step 2. Set up Multisig Shield 2FA in Blockstream App
Setting up Multisig Shield requires the Blockstream Green wallet app and a Jade device running updated firmware. Before you begin, confirm your Jade is initialized with a PIN and that you have your seed phrase backed up and stored offline. Do not proceed without that backup in place.
What you need before you start
You need the Green app installed on your phone or desktop, Bluetooth or USB connectivity for your Jade, and an active internet connection. The Oracle server that powers Multisig Shield requires network access to verify your transaction conditions, so keep that in mind if you use Jade in air-gapped mode for other wallets.
- Green app (mobile or desktop)
- Jade with updated firmware
- USB cable or Bluetooth enabled
- Internet connection on your signing device
Enabling Multisig Shield step by step
Open the Green app and create a new wallet. Select the "2FA-Protected" account type, which activates the Multisig Shield model for your blockstream jade multisig setup. Then follow these steps:
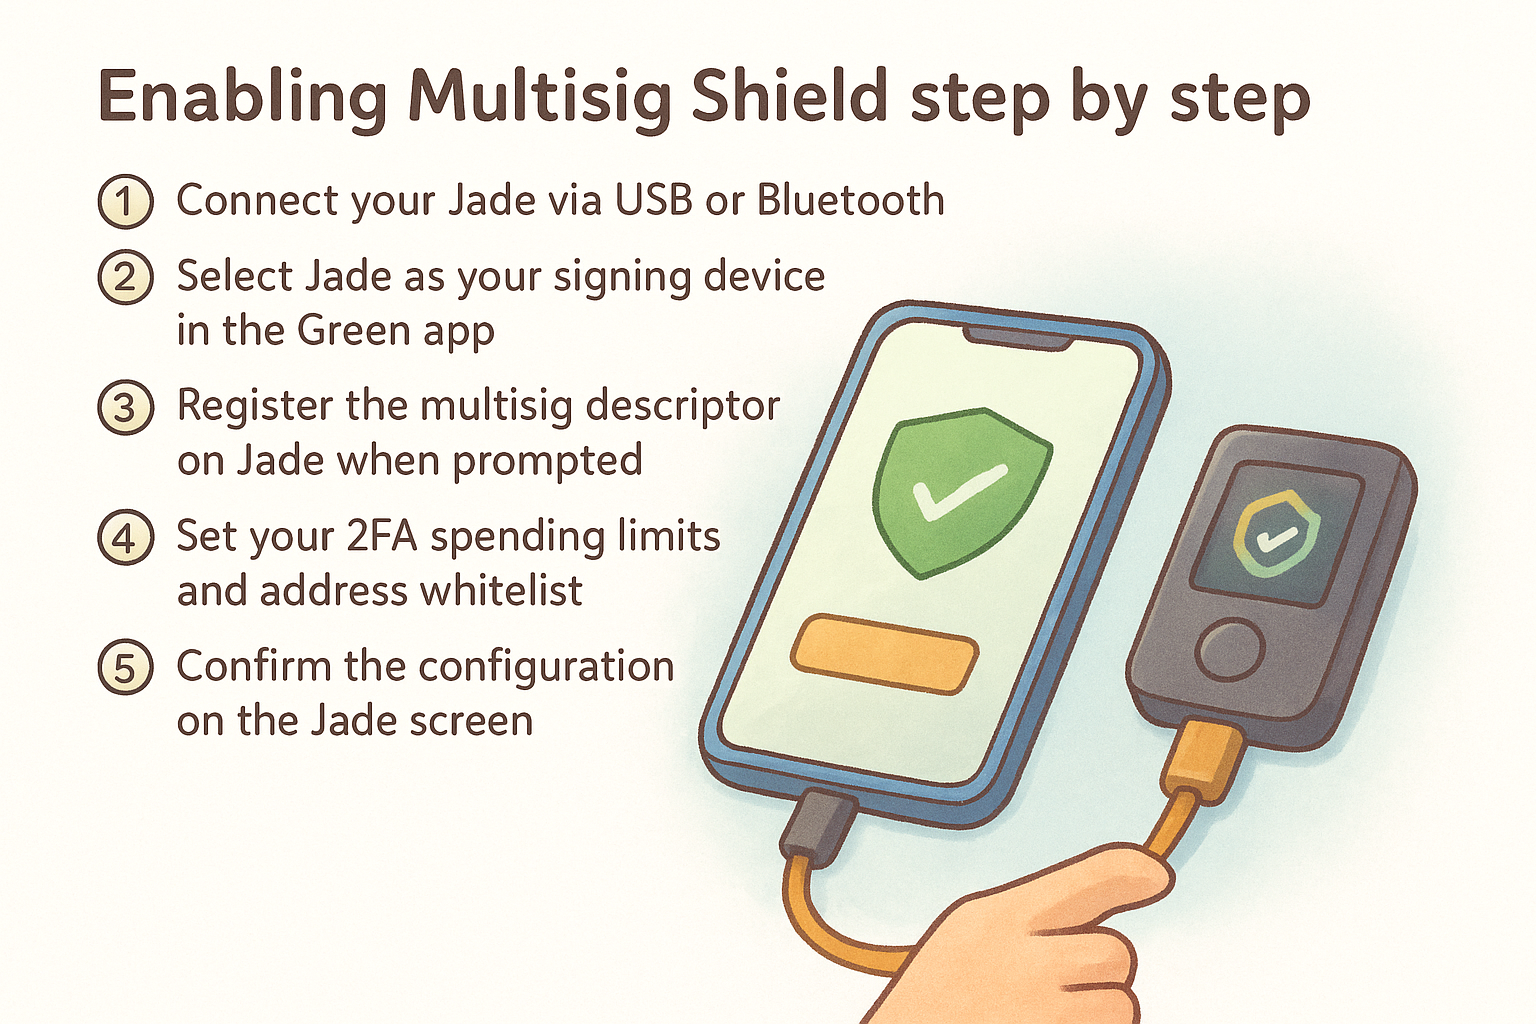
- Connect your Jade via USB or Bluetooth
- Select Jade as your signing device in the Green app
- Register the multisig descriptor on Jade when prompted
- Set your 2FA spending limits and address whitelist
- Confirm the configuration on the Jade screen
Always verify the wallet descriptor on the Jade display before confirming, because this step locks in your multisig policy.
Step 3. Set up a standard multisig wallet with Jade
Standard multisig gives you complete self-custody with no server involved. In this configuration, your Blockstream Jade multisig setup pairs with two other signing devices, typically other hardware wallets, and a coordinator like Sparrow Wallet manages the signing workflow. You'll need each device's xpub and the final multisig descriptor registered on every signer.
What you need before you begin
Gather your hardware and software before starting. Missing any piece mid-setup creates errors that are frustrating to untangle.
- Blockstream Jade with updated firmware
- Two additional hardware wallets (from different manufacturers for best practice)
- Sparrow Wallet installed on an offline or dedicated computer
- USB cables for each device
Configuring Jade in Sparrow Wallet
Open Sparrow Wallet and select File > New Wallet, then choose "Multi Signature" as the script type. Set your quorum, such as 2-of-3, and add each cosigner by connecting devices one at a time and exporting their xpub. When you reach Jade, connect via USB and follow the on-screen prompt to export its xpub directly into Sparrow.
Once Sparrow generates the full multisig descriptor, you must register it back on every signing device, including Jade, before the wallet is considered complete.
Confirm the descriptor fingerprint matches across all devices before sending any funds to the wallet address.
Step 4. Back up, test recovery, and avoid lockouts
Backups for a blockstream jade multisig configuration go beyond just your seed phrase. You need to preserve the complete multisig wallet descriptor, which contains every cosigner's xpub and the quorum policy. Without it, your seed phrase alone is not enough to reconstruct the wallet.
Back up your multisig descriptor
Export the descriptor from your coordinator wallet and store it in at least two separate physical locations, such as a printed copy and an encrypted USB drive kept apart from each other. Every cosigning device needs a copy of this descriptor registered on it before the setup is complete.
Losing the descriptor in a standard multisig setup means losing access to your funds, even if you have all your seed phrases intact.
Test recovery before you fund the wallet
Before sending any real funds, wipe one of your signing devices and restore it using its seed phrase. Then re-import the descriptor and confirm the wallet address matches exactly. This dry run proves your recovery process actually works and eliminates any guesswork during a real emergency.
Avoid the most common lockout causes
Skipping descriptor backup and failing to register it on each device are the two mistakes that cause permanent lockouts. Keep this checklist before funding:
- Descriptor saved and stored in two locations
- Descriptor registered on every signing device
- Recovery test completed and address verified
- Seed phrases stored offline and separately from each device
Wrap-up and next steps
Setting up blockstream jade multisig correctly comes down to three things: choosing the right configuration for your situation, backing up your descriptor without exception, and testing recovery before any funds move. Whether you chose Multisig Shield for convenience or a standard 2-of-3 for full independence, the logic stays the same: multiple keys, verified backups, and a tested recovery process before you send a single satoshi to the wallet address.
From here, the natural next step is building a deeper understanding of how wallets, private keys, and self-custody actually work together, because strong security depends on understanding the system, not just following setup steps. If you want structured, practical guidance on crypto security from the ground up, the FinTech Dynasty crypto education course walks you through wallet selection, seed phrase management, and cold storage best practices in a clear, no-hype format. Your security is only as strong as your understanding of it.