

Safe Multisig Wallet: How To Set Up And Use It Securely
Storing crypto in a single wallet controlled by one private key creates an obvious problem: if that key is lost or compromised, everything disappears. A safe multisig wallet solves this by requiring multiple approvals before any transaction executes, and Safe (formerly Gnosis Safe) has become the most widely adopted multisig platform in the space, trusted by individuals, teams, and DAOs across multiple blockchains.
Whether you're managing funds with a partner, overseeing a shared treasury, or adding a structural layer of protection to your personal holdings, multisig removes the single point of failure that makes standard wallets risky. But the setup process matters. A misconfigured multisig can lock you out of your own assets or create approval bottlenecks that make the wallet nearly unusable.
This guide walks you through how to create, configure, and use a Safe multisig wallet step by step. At FinTech Dynasty, our focus is on the practical side of crypto security, self-custody, wallet management, and protecting digital wealth without the noise of market speculation. We built this guide to give you a clear understanding of how Safe works, how to choose the right signer and threshold setup, and how to avoid the most common mistakes people make when going multisig for the first time.
What a Safe multisig wallet is and when to use it
Safe is a smart contract-based wallet that runs on Ethereum and a growing list of compatible networks. Unlike a standard wallet where one private key controls everything, a Safe multisig wallet requires a predefined number of signers to approve each transaction before it executes. You define both the group of owners and the approval threshold when you deploy the contract, and the blockchain enforces those rules automatically without any central authority involved.
How the multisig approval model works
At its core, the Safe contract holds your assets and only releases them when the required signatures are collected. You choose an M-of-N signing structure: for example, a 2-of-3 setup means the Safe has three owner addresses and any two of them must sign to approve a transaction. Each owner wallet signs the proposed transaction independently, and the last required signer triggers the on-chain execution.
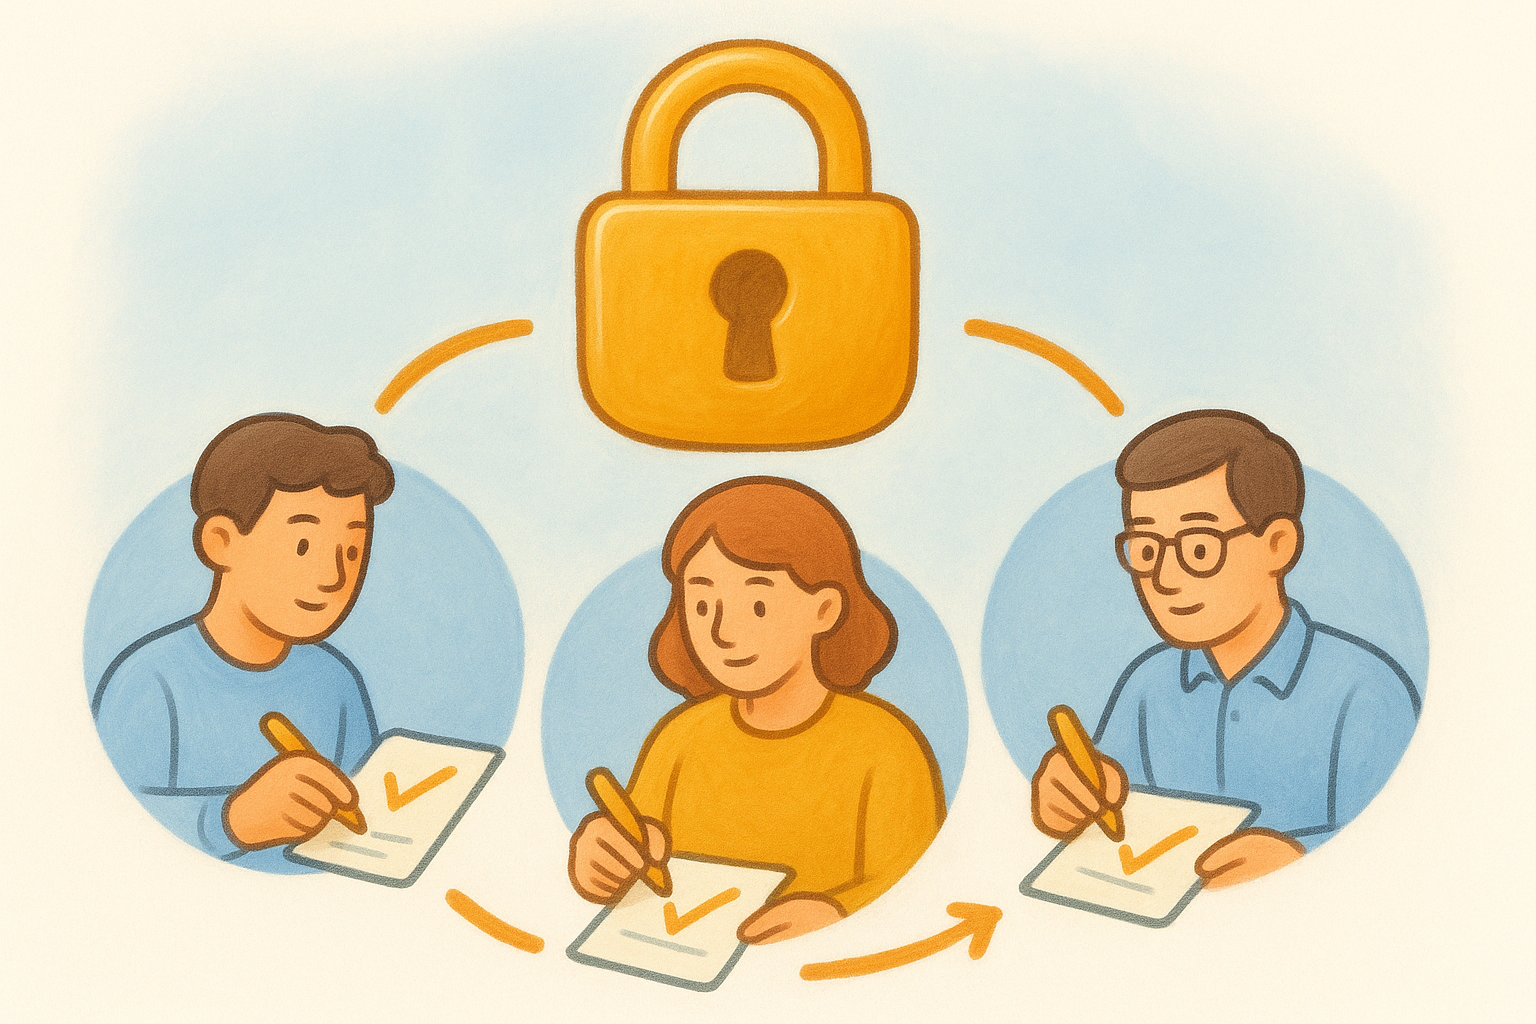
The threshold you choose is locked in until you pass another multisig vote to change it, so getting this number right from the start matters more than most people realize.
Safe uses smart contract logic, which means the wallet itself is a deployed contract with its own address on the blockchain. This is different from an externally owned account (EOA) like MetaMask, where the wallet is simply a private key. Because Safe is a contract, it can enforce complex approval rules, support add-on modules, and log every signature on-chain for complete transparency.
What makes Safe different from a standard wallet
Most hardware wallets and software wallets are single-signature by design. They protect your private key from exposure, but they don't protect you from losing that key, or from a scenario where one compromised signer can drain the account instantly. Safe addresses both of those risks by distributing control across multiple keys held by different people or stored in separate physical locations.
Safe also supports custom modules and spending guards that add further controls, such as daily transfer limits, role-based permissions, and time-locked transactions. These features make it practical for everything from a personal cold storage setup using multiple hardware wallets to a company treasury that requires sign-off from a CFO and two board members before any funds move.
When a Safe multisig wallet makes sense for you
A safe multisig wallet is worth deploying in several concrete situations. If you hold a significant amount of crypto and want redundancy across multiple signing devices, multisig protects you against a single hardware failure or a lost seed phrase. If you share funds with a business partner or co-founder, it enforces joint approval without requiring either of you to trust the other unconditionally.
Teams running DAOs or protocol treasuries use Safe because every transaction is proposed, reviewed, and signed on-chain, which creates a complete audit trail accessible to anyone. Even solo holders increasingly use Safe in a 2-of-3 personal setup, distributing keys across a Ledger, a Trezor, and a cold backup stored in a separate physical location.
Here are the most common use cases where Safe adds clear value:
- Personal security: 2-of-3 setup across multiple hardware wallets you own
- Joint accounts: 2-of-2 or 2-of-3 between two or more people sharing a fund
- Team treasuries: 3-of-5 or higher for organizations that need distributed approval
- Protocol or DAO governance: on-chain, auditable control of smart contract funds
- Long-term cold storage: structured access that survives the loss of any single key
Choosing the right setup requires thinking through who will sign, where those keys are stored, and how quickly you need to execute transactions. A 3-of-5 setup across geographically separated signers might work well for a DAO treasury, but it would slow down a solo holder who needs to move funds within minutes. The sections below walk you through each of those decisions in detail.
Before you start: devices, wallets, networks, gas
Before you deploy a safe multisig wallet, you need the right components ready. Skipping this preparation leads to the most common setup mistakes: deploying on the wrong network, running out of gas mid-transaction, or adding signer addresses you can't actually access. Taking ten minutes to sort out the following details will save you significant trouble later.
Hardware and software wallets you need as signers
Each signer in a Safe is represented by an Ethereum-compatible wallet address. That address can come from a hardware wallet like a Ledger or Trezor, a software wallet like MetaMask, or any externally owned account that can connect to the Safe interface. For maximum security, use hardware wallets for every signer address rather than software-only options. If you're setting up a personal 2-of-3, have at least two hardware wallets in hand before you start.
You also need one connected wallet to act as the deployer during setup. This doesn't have to be one of the signers, but most people use their primary hardware wallet for this role. Make sure each signer has tested their wallet connection through a browser extension or WalletConnect before the group proceeds.
Which network to deploy on
Safe supports Ethereum mainnet, Arbitrum, Optimism, Base, Polygon, Gnosis Chain, and several others. Choosing the right network depends on your use case. If you're storing high-value assets long-term, Ethereum mainnet offers the strongest security guarantees. If you need lower fees and faster confirmation times for active use, a Layer 2 like Arbitrum or Base is a practical choice.
Deploying on one network does not automatically create your Safe on any other. Each deployment is a separate contract with its own address.
Note that a Safe on Ethereum mainnet and a Safe on Arbitrum are completely separate contracts, even if they share the same owner addresses. If you want coverage on multiple networks, you need to deploy and fund independently on each one.
Gas fees and deployment costs
Deploying a Safe requires a one-time on-chain transaction that creates the smart contract, so your deployer wallet needs native currency on the chosen network before you begin. On Ethereum mainnet, deployment typically costs between $5 and $30 depending on current gas prices. On Layer 2 networks, the cost drops to under $1 in most cases.
Keep enough gas in the deployer wallet to cover both the initial deployment and at least a few test transactions before you move any significant funds into the contract.
Step 1. Plan owners and signature threshold
Before you open the Safe interface, write down every owner address you plan to add and decide how many signatures your wallet will require. This planning step prevents the most expensive mistake people make: deploying a safe multisig wallet with incorrect signers or a threshold that locks the contract permanently.
Choose your owner addresses
Each owner in a Safe is a separate Ethereum-compatible wallet address. You can add hardware wallet addresses, software wallet addresses, or a mix of both. The key rule is that you must be able to independently access and sign from each address before you add it. Do not add an exchange deposit address, a smart contract address, or any wallet you have not tested.
Never add an address you don't fully control, because a locked or inaccessible owner can block you from ever reaching your threshold.
Write out each owner address in full before you deploy. Verify each one by connecting that wallet to a test transaction and confirming the signature works. Label each address clearly, such as "Ledger 1 - Hardware" or "MetaMask - Laptop", so every co-signer in your group can track them without confusion.
Pick the right M-of-N threshold
Your threshold determines how many owners must sign before any transaction executes. Choosing the wrong number is a permanent problem until you pass another multisig vote to change it, so treat this decision seriously. The table below shows the most common configurations and their practical trade-offs:
| Setup | Total Owners | Required Signers | Best For |
|---|---|---|---|
| 2-of-3 | 3 | 2 | Personal redundancy, tolerates one lost key |
| 2-of-2 | 2 | 2 | Two-person joint control, both must approve |
| 3-of-5 | 5 | 3 | Small team treasury, tolerates two absences |
| 4-of-7 | 7 | 4 | Larger organization or DAO |
For personal use, a 2-of-3 setup across two hardware wallets and one securely stored backup address gives you both security and recovery flexibility. For team use, add at least one more owner than your threshold requires so the group can still reach consensus if one signer becomes temporarily unavailable.
Avoid setting your threshold equal to your total owner count unless you have a specific reason for it. A 3-of-3 configuration means that if any single signer loses access permanently, the wallet locks and no one can move the funds.
Step 2. Create and deploy a Safe in the Safe app
With your owner addresses confirmed and your threshold decided, you're ready to deploy the contract. Go to app.safe.global in a browser that has your signing wallet extension installed, or connect via WalletConnect if you're using a mobile wallet. The Safe interface loads a dashboard where you can either load an existing Safe or create a new one. Click "Create new Safe" to begin the guided setup flow.
Connect your deployer wallet and name your Safe
The first screen asks you to connect a wallet. This wallet covers the gas cost of deployment and submits the creation transaction, but it does not need to be one of your signers. Connect your hardware wallet through MetaMask or a compatible browser extension. You'll also see a name field for your Safe that exists only in your local browser storage, so choose something descriptive like "Team Treasury - Ethereum" or "Personal 2-of-3 - Arbitrum" to keep things clear across multiple setups.
Select the network you planned during preparation. The interface displays your selected network prominently at the top, so confirm it matches your intended chain before moving forward.
Add owners and set the threshold
The next screen is where you enter every owner address you wrote down in Step 1. Paste each address one at a time and give each owner a label inside the interface. Labels are stored locally and not written on-chain, so they help you stay organized without exposing any information publicly. Double-check each address character by character before advancing. A single wrong digit routes control to an address you don't own.
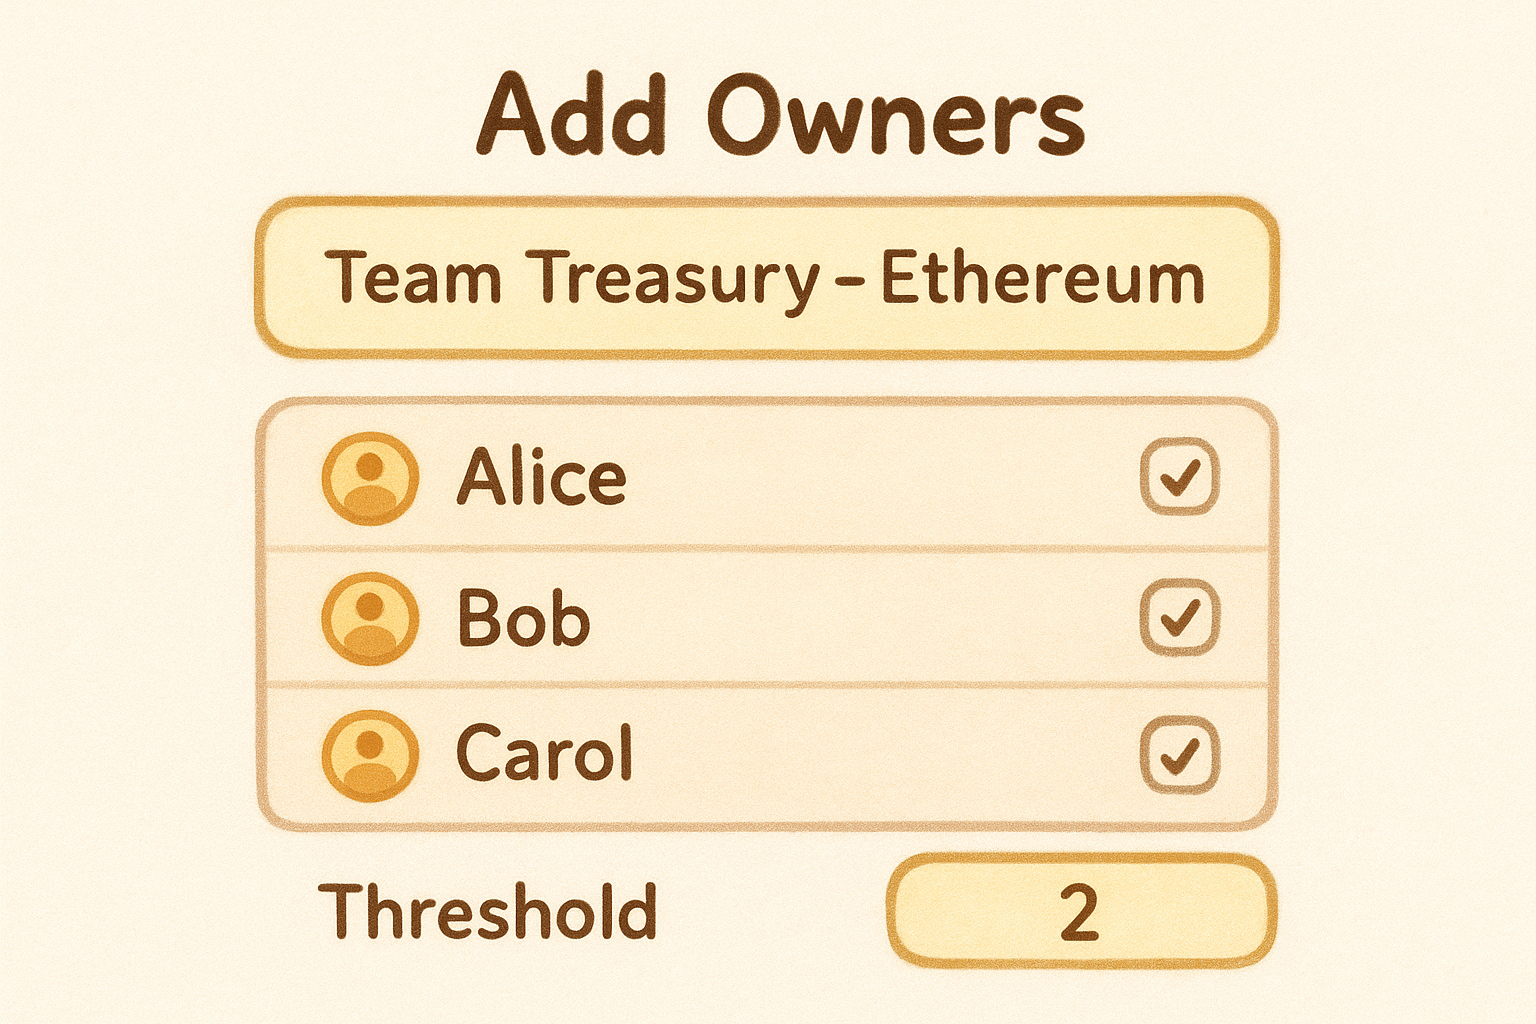
Once the Safe is deployed, removing an incorrect owner requires a separate on-chain transaction that needs enough signatures to meet your current threshold.
Below the owner list, set your signature threshold. The interface enforces that the threshold cannot exceed the number of owners you've added. Review your M-of-N selection one final time before proceeding.
Review and submit the deployment transaction
The final screen shows a summary of your full configuration: network, owners, threshold, and estimated gas cost. Confirm every detail matches your plan, then click "Create" and approve the transaction in your connected wallet. Layer 2 networks confirm in seconds; Ethereum mainnet may take up to a minute. After confirmation, your safe multisig wallet contract is live with its own permanent on-chain address.
Verify each item on the review screen before you approve:
- Network: matches the chain you selected during preparation
- Owner count: matches every address planned in Step 1
- Threshold: set to your intended M-of-N number
- Estimated gas: your deployer wallet holds enough to cover it
Step 3. Add the Safe for each signer and set access
After deployment, only the wallet that created the Safe sees it loaded automatically. Every other owner needs to add the Safe to their own Safe app interface before they can propose or sign transactions. This step takes less than two minutes per person, but skipping it means co-signers have no way to respond when a transaction comes through for approval.
Share the Safe address with every co-signer
Your newly deployed contract has a permanent on-chain address that every signer needs. Copy it from the Safe app dashboard immediately after deployment and distribute it to each co-owner through a channel your group agrees on. Include the network name alongside the address, since the same address string could exist on multiple chains and pointing someone to the wrong network wastes their time.
A simple message to send each co-signer looks like this:
Safe address: 0xYourSafeAddressHere
Network: Arbitrum One
Required signers: 2 of 3
Your owner address: 0xTheirSpecificOwnerAddress
Sending this as a written record also gives each signer a reference they can verify independently before they add anything to their wallet interface.
Load the Safe and confirm read access
Each co-signer opens app.safe.global, connects their own wallet, and clicks "Add existing Safe" from the main dashboard. They paste the address you shared, select the matching network, and confirm. The app pulls the contract data from the blockchain and displays the current owner list, threshold, and any pending transactions waiting for signatures.
Ask every co-signer to verify that their address appears in the owner list inside the Safe interface before you move any funds into the contract.
Once loaded, each signer should confirm three things: their own address appears in the owner panel, the threshold matches what you planned in Step 1, and the network label in the top navigation matches the chain you deployed on. If anything looks wrong at this stage, resolve it before adding funds.
Verify signing access with a test transaction
The fastest way to confirm that each signer has proper access is to propose a zero-value or minimal transaction inside the Safe and have each co-signer locate it and attempt a signature. This dry run surfaces wallet connection issues, browser extension conflicts, or hardware wallet firmware problems before real assets are at risk. A fully functional safe multisig wallet requires every intended signer to complete this test successfully, not just the person who deployed the contract.
Step 4. Fund the Safe and organize assets
Your safe multisig wallet contract is live, every signer has confirmed access, and now you're ready to move assets in. Treat this step with the same care you gave to setup. Sending funds to the wrong network or a mistyped address is irreversible, so a disciplined deposit process protects you from costly errors before any real value enters the contract.
Send a small test deposit first
Before you transfer any meaningful amount, send a small test deposit to the Safe address on the network you deployed on. A few dollars worth of native currency or a small token amount works fine. Confirm the deposit appears in the Safe dashboard, then propose a small outgoing transfer back to one of your signer wallets and complete the full signing and execution flow with your co-signers. This test confirms the contract receives funds correctly, the Safe interface displays the balance, and every signer can approve and execute without any technical issues.
Never skip the test deposit step, because a contract deployment that looks correct can still have subtle network or address issues that only surface when you attempt a real transaction.
Transfer assets in order of risk
Once the test passes, move remaining assets starting with the lowest-value holdings first. This keeps your exposure limited while you build confidence in the workflow. For each asset type, note the correct token contract address and network before initiating any transfer, since bridged or wrapped tokens often have different contract addresses across chains.
A practical deposit order for a new Safe looks like this:
- Native gas token in a small amount (confirm balance displays correctly)
- Stablecoins at a partial amount (confirm token appears in the asset list)
- Remaining stablecoins and ERC-20 tokens
- High-value assets like ETH or wrapped BTC last
Keep assets organized inside the Safe
The Safe dashboard shows your full asset list and balances across all tokens held by the contract. Use the built-in labeling features and the Safe app's portfolio view to track what you hold and on which network. If you run multiple Safes across different chains, give each one a descriptive name during deployment so you can distinguish them immediately in the interface.
Organize your holdings by assigning clear purposes to each Safe from the start. A treasury Safe, a spending Safe for regular outflows, and a cold storage Safe for long-term holdings each serve a different function and keeping them separated reduces the risk of accidentally moving funds from the wrong contract.
Step 5. Propose, review, sign, and execute transactions
With funds in your safe multisig wallet and every signer confirmed, you're ready to run transactions through the full approval flow. Any owner wallet can propose a transaction at any time, but no funds move until enough owners sign to meet the threshold. Understanding this flow before you need to use it under pressure keeps the process fast and error-free.
Propose a transaction from any owner wallet
To initiate a transfer, connect your owner wallet to the Safe app, navigate to "New transaction", and select either a token transfer or a contract interaction. Enter the recipient address, the token type, and the amount. The Safe interface previews the transaction details on screen before you submit anything on-chain. Review every field carefully at this stage, including the destination address and the token contract, then click "Add to batch" or "Send" to push the proposal into the queue.
Submitting a proposal signs it with your own key and writes the proposal to the Safe's pending transaction queue, where every other owner can see it. No gas is charged until the final required signer executes the transaction, so proposing costs nothing beyond the first signature.
Always verify the recipient address character by character before submitting a proposal, since a single wrong digit routes funds permanently to an address you don't control.
Review the details before signing
Each co-signer opens the Safe app, connects their wallet, and sees the pending transaction in the queue. Before signing, each signer should check the recipient address, the token type, the transfer amount, and the total number of signatures already collected. The Safe app displays all of this information on the transaction detail screen. Treat this review step as mandatory, not optional.
A pre-signing checklist for each signer:
- Recipient address matches the agreed destination
- Token type and amount are correct
- Network label in the interface matches the chain holding the funds
- Signer count shown is accurate and no unexpected approvals appear
Collect signatures and execute
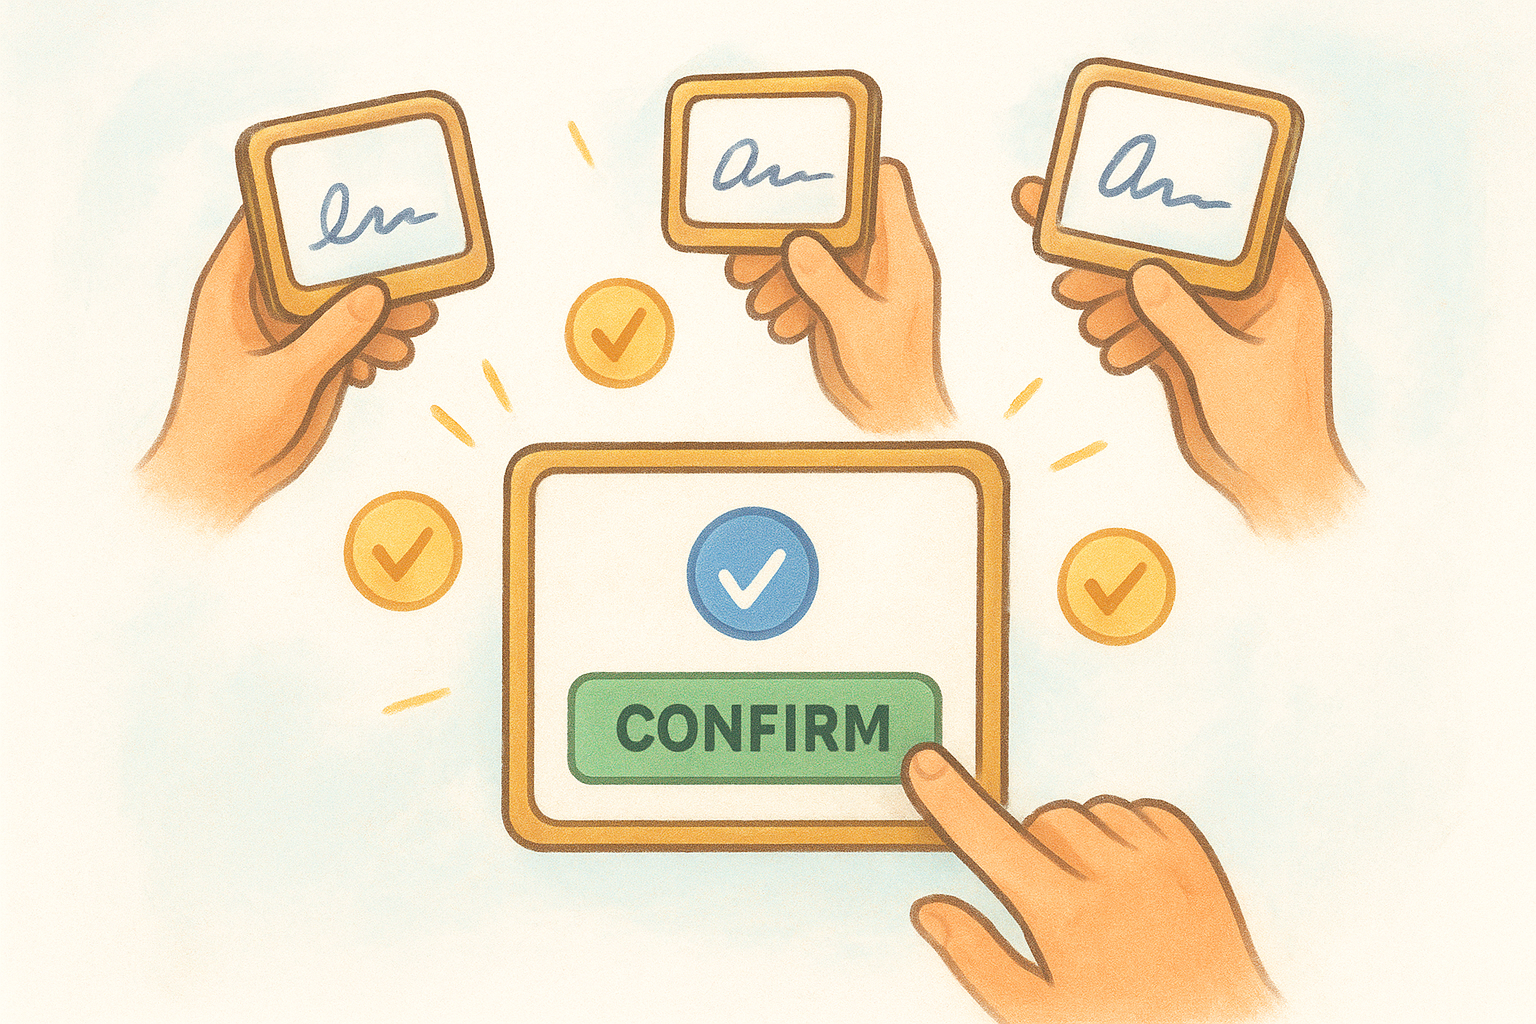
Each signer connects their wallet, opens the pending transaction, and clicks "Confirm" to add their signature. Signatures accumulate off-chain until the threshold is reached. The signer who submits the final required signature also triggers on-chain execution by paying the gas fee at that moment. After confirmation, the Safe dashboard marks the transaction as executed and updates the contract balance automatically.
Step 6. Use Safe with dapps via Safe Apps and WalletConnect
Your safe multisig wallet isn't limited to simple transfers. Safe integrates directly with decentralized applications through two separate paths: built-in Safe Apps that load inside the interface itself, and WalletConnect for external dapps that don't have a native Safe integration. Both methods route every interaction through the same multisig approval flow, so any action you take in a dapp still requires the threshold of signatures before it executes on-chain.
Use the built-in Safe Apps library
Safe Apps are dapps embedded directly inside the Safe interface at app.safe.global. You access them by clicking the "Apps" tab in the left navigation panel. The library includes commonly used protocols for lending, swapping, staking, and governance voting. When you interact with a Safe App, the transaction it generates drops into your pending queue just like any manual transfer, and your co-signers can review and sign it from their own wallets without needing to visit the dapp themselves.
To use a Safe App, open the Apps section, find the protocol you want, and interact with it as you normally would on any dapp. The key difference is that no transaction executes immediately regardless of what you click in the interface. Every action becomes a proposal that your group must approve before the blockchain processes it.
This queuing behavior is one of the strongest practical benefits of using a Safe: even a compromised browser session can't drain the wallet without the required co-signers approving.
Connect to external dapps via WalletConnect
For dapps that aren't in the Safe Apps library, use WalletConnect to bridge your Safe to any compatible external protocol. Inside the Safe app, open the WalletConnect option from the top menu, copy the connection URI from the external dapp's wallet selector, and paste it into the Safe interface. The dapp then treats your Safe address as the connected wallet.
Once the connection is live, transactions you initiate on the external dapp route back to your Safe's pending queue rather than executing instantly. Your co-signers see the proposed transaction in their Safe dashboard and sign it the same way they would for any other outgoing transaction. This approach works with most major DeFi protocols including lending markets, DEX aggregators, and governance platforms.
A working WalletConnect session shows your Safe address and network in the external dapp's connected wallet panel. If the dapp shows a standard EOA address instead, disconnect and reconnect to confirm the Safe is the active wallet, not your signer's personal wallet.
Step 7. Verify your Safe on a block explorer
After your safe multisig wallet is deployed and funded, verify everything directly on a block explorer before treating the setup as complete. The Safe app interface shows you a clean, formatted view of your contract, but the raw on-chain data is the authoritative source. Checking the block explorer confirms that your owner addresses, threshold, and transaction history match exactly what you configured, with no interface layer filtering the results.
Find your Safe contract on the block explorer
Copy your Safe address from the app dashboard and paste it into the search bar of the appropriate block explorer for your network. For Ethereum mainnet, use Etherscan. For Arbitrum, use the Arbiscan explorer. For Optimism, use the Optimistic Etherscan explorer. The block explorer loads your contract page, which shows the current balance, token holdings, and the full transaction history tied to that address. Confirm that the contract was deployed at the timestamp you expect and that the contract type identifies as a proxy contract, which is consistent with Safe's standard deployment format across all supported networks.
Read the owner list and threshold on-chain
Click the "Contract" tab on the block explorer page, then open the "Read Contract" section. Safe contracts expose public read functions you can call directly from the explorer without connecting a wallet. Call the getOwners() function to retrieve the complete list of owner addresses stored on-chain, then call getThreshold() to confirm the required number of signatures. Compare both outputs against the owner list and M-of-N configuration you planned in Step 1.
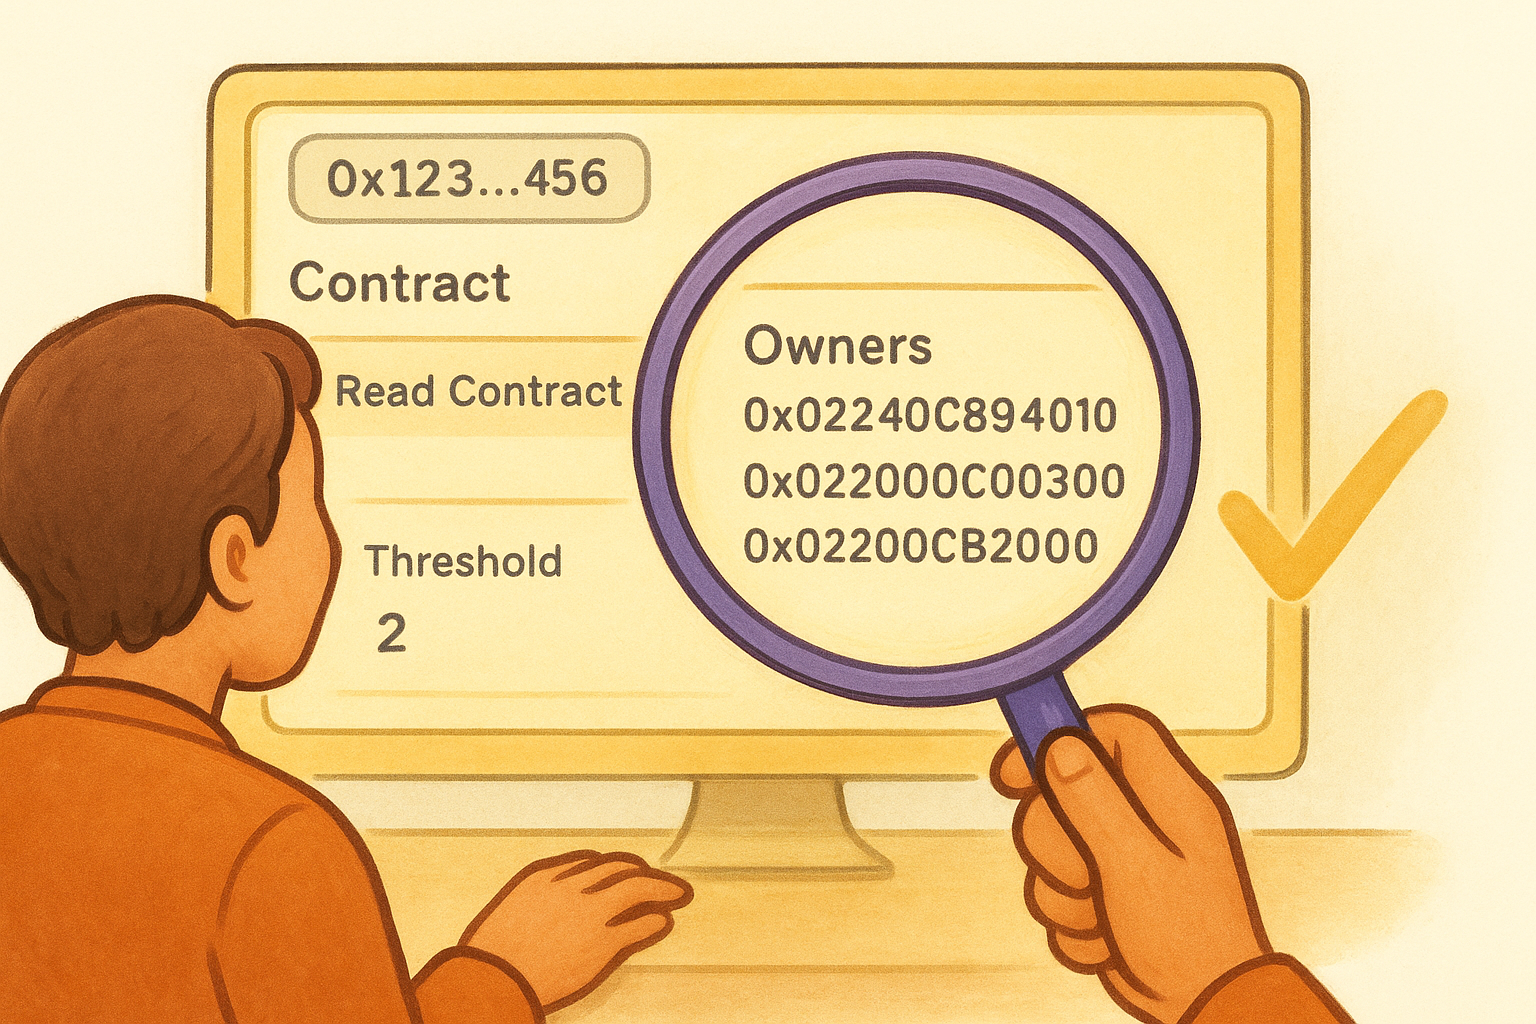
If the on-chain owner list does not match your planned configuration exactly, do not add further funds until you resolve the discrepancy through a corrective multisig transaction signed by enough current owners.
Run through this verification checklist directly on the block explorer before moving on:
-
getOwners()returns every address you added, with no additional entries -
getThreshold()returns your intended M-of-N number - Contract balance matches the test deposit amount from Step 4
- No unexpected outgoing transactions appear in the history
Review the full transaction history
The transaction history tab on the block explorer shows every interaction with your Safe contract since deployment, including the creation transaction, incoming deposits, and all executed outgoing transfers. Scroll through this list and confirm that each entry corresponds to an action you or your co-signers intentionally authorized. A transaction you don't recognize requires immediate investigation before you continue using the wallet or add any additional assets.
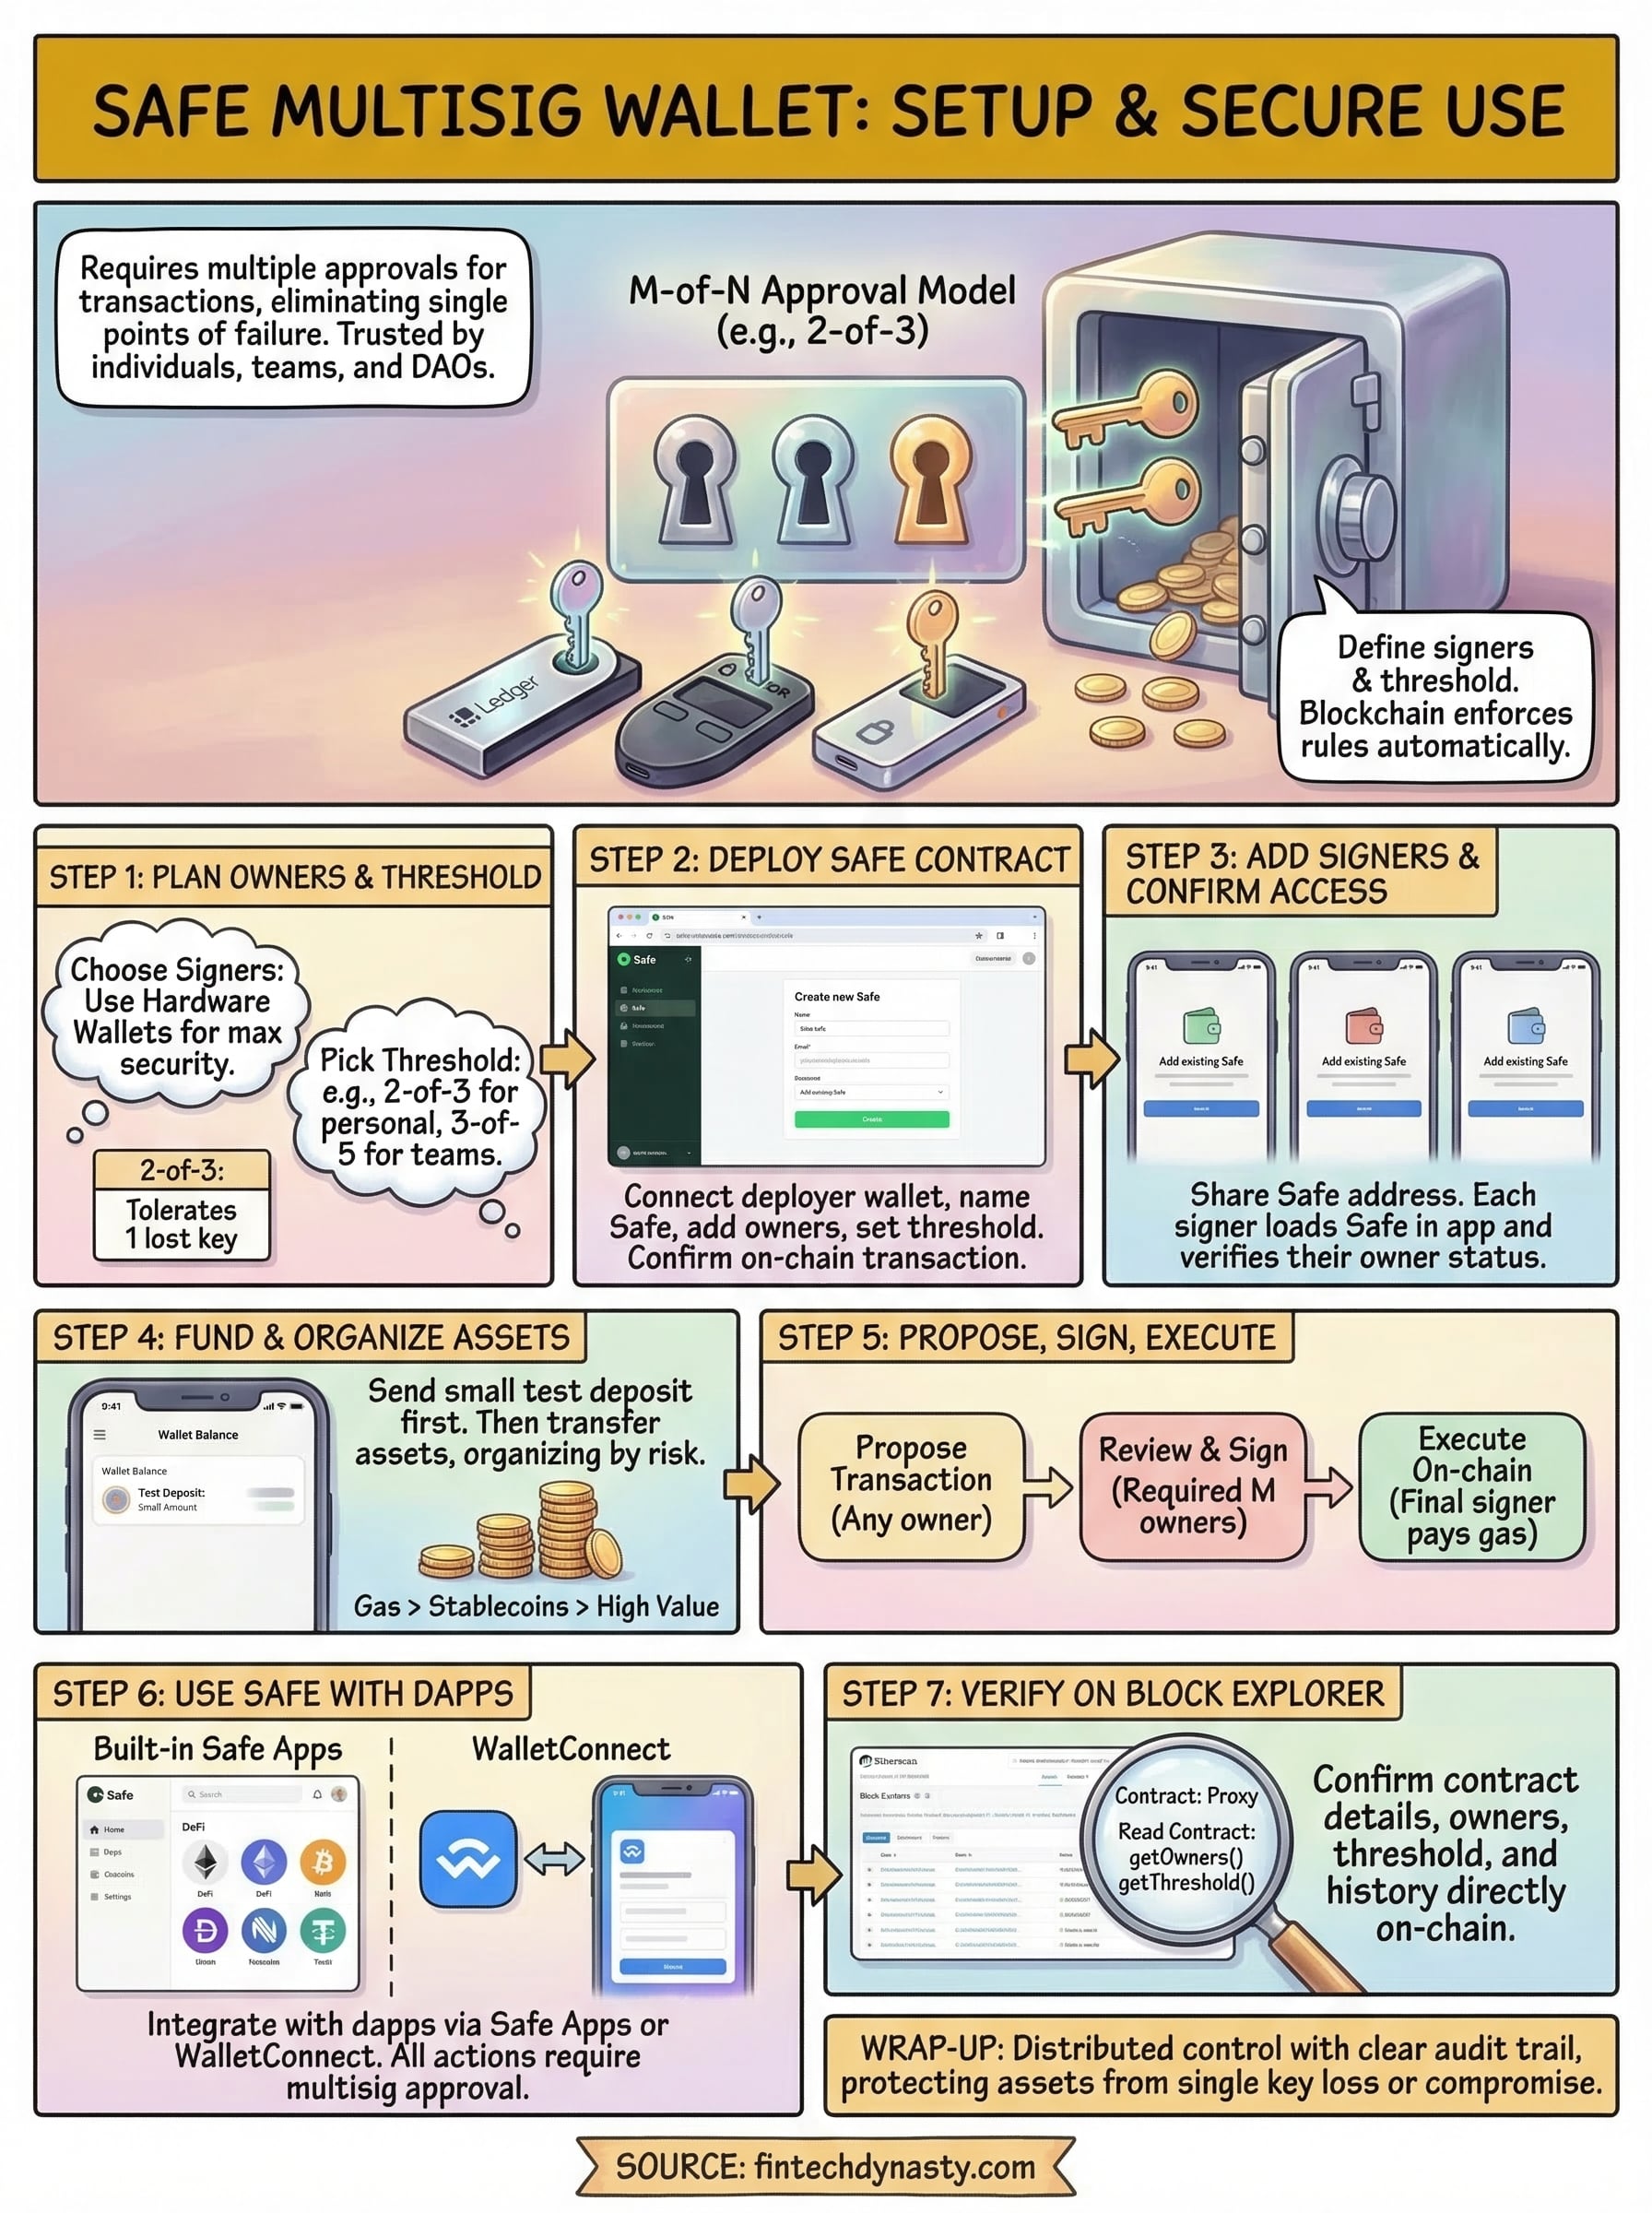
Wrap-up
A safe multisig wallet through Safe gives you structural control over your crypto that a single-signature wallet simply can't match. You've now covered every step: planning owners and thresholds, deploying the contract, confirming signer access, funding the wallet, running transactions through the approval flow, connecting to dapps, and verifying everything on-chain through a block explorer. Each step builds on the last, and skipping any one of them creates gaps that undermine the security you built the setup to provide.
The goal isn't complexity for its own sake. It's distributed control with a clear audit trail that protects your assets even if one key is lost, one signer becomes unavailable, or one device is compromised. Take your time with the setup, test every function before moving significant funds, and treat the block explorer verification as a required final step, not an optional one. For more guides on hardware wallets, self-custody, and crypto security best practices, visit FinTech Dynasty.