

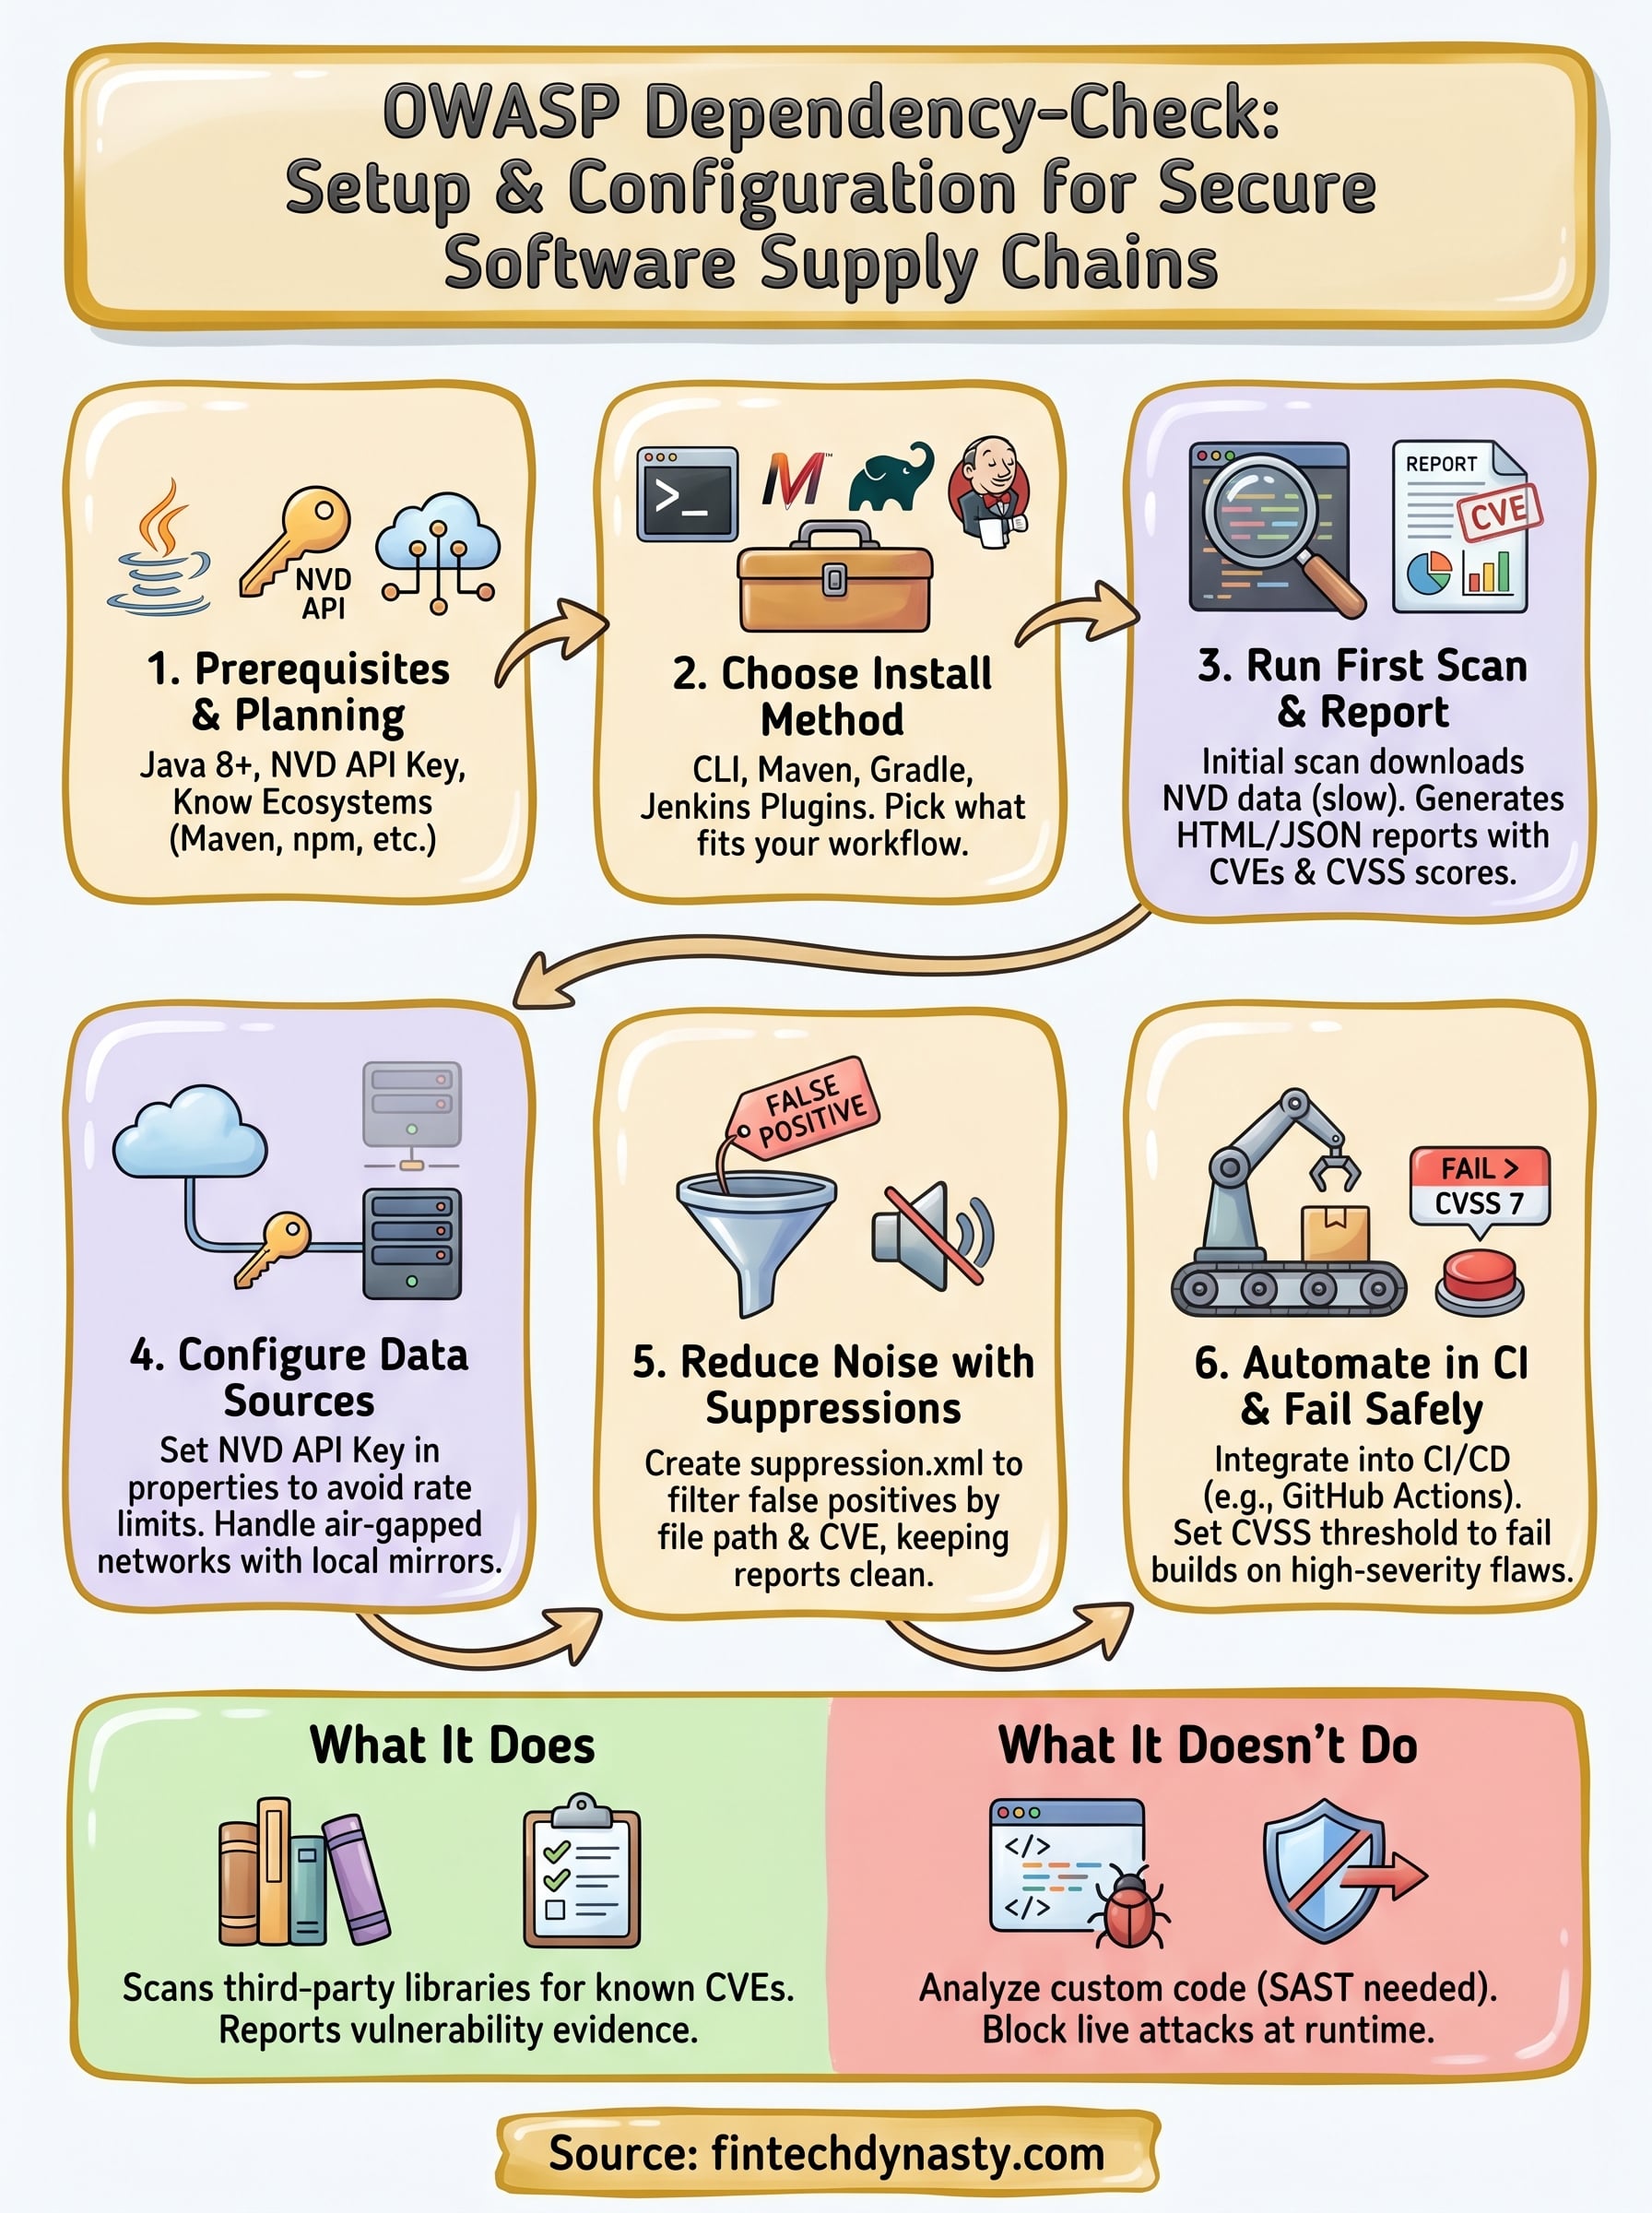
OWASP Dependency-Check Documentation: Setup & Configuration
Every piece of software your crypto wallet or fintech application depends on is a potential attack surface. Vulnerable third-party libraries have been at the root of some of the most damaging breaches in financial technology, which is exactly why tools like OWASP Dependency-Check exist. If you've been searching for the OWASP Dependency-Check documentation to get started, you're already making a smart move toward hardening your software supply chain.
At FinTech Dynasty, we focus on the security side of crypto, from hardware wallet comparisons to self-custody best practices. But protecting digital assets doesn't stop at seed phrases and cold storage. The applications and tools you build or rely on need the same level of scrutiny, and that starts with knowing whether your project's dependencies carry known vulnerabilities (CVEs) that attackers can exploit.
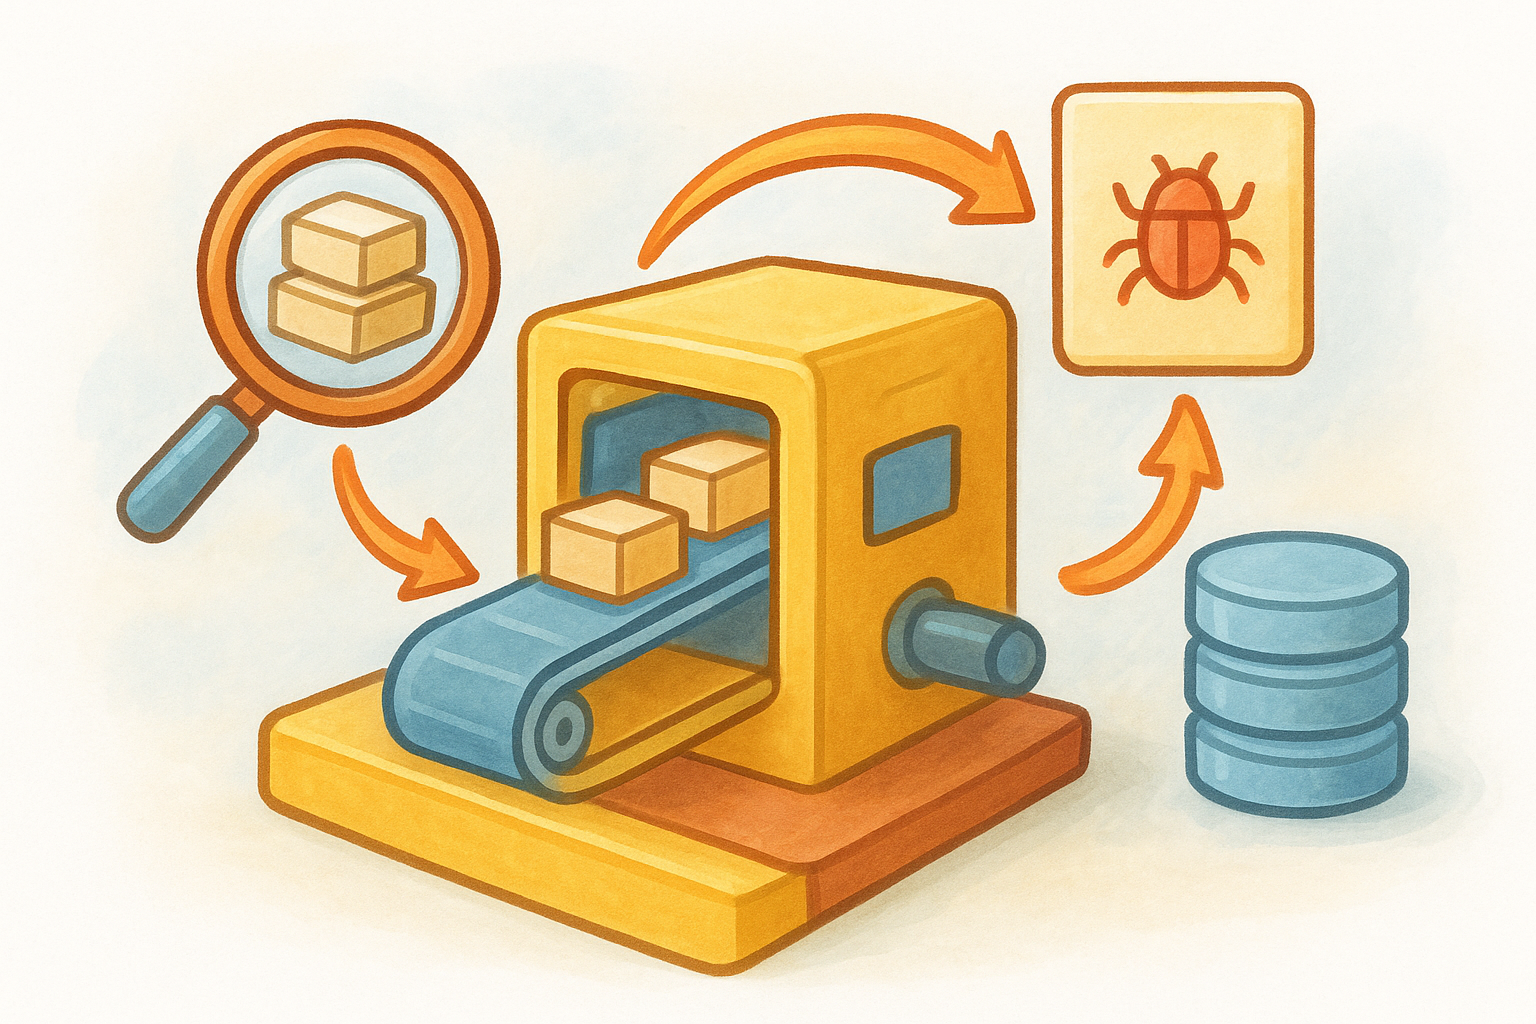
OWASP Dependency-Check is a free, open-source software composition analysis (SCA) tool that scans your project's dependencies and flags any that match entries in the National Vulnerability Database (NVD). It integrates with Maven, Gradle, Jenkins, and other common build systems, making it practical for real-world development workflows. This guide walks you through the full setup and configuration process, from installation and initial scans to tuning suppression files and automating checks in your CI/CD pipeline. By the end, you'll have a working Dependency-Check implementation ready to catch vulnerable components before they reach production.
What OWASP Dependency-Check does and does not do
Understanding exactly what this tool handles prevents you from over-relying on it or dismissing results you don't expect. OWASP Dependency-Check is a software composition analysis (SCA) tool, meaning it focuses entirely on the third-party components your project pulls in, not the code you write yourself. When you run a scan, the tool identifies your project's declared and transitive dependencies, then cross-references them against known vulnerability databases to surface any matches.
How Dependency-Check works under the hood
Dependency-Check collects evidence about each library it finds in your project, including the library name, version, and group ID. It then uses a Common Platform Enumeration (CPE) analyzer to match that evidence against entries in the National Vulnerability Database (NVD), which is maintained by NIST. When it finds a match, it records the associated CVE identifiers, severity scores (CVSS), and descriptions in its generated report.
Every CVE it flags traces back to a publicly disclosed vulnerability, which means attackers likely already know about these weaknesses before you run your first scan.
The tool supports a wide range of package ecosystems, making it applicable across most modern development stacks:
- Java (Maven, Gradle, JAR files)
-
JavaScript/Node.js (npm, Yarn
package-lock.json) - .NET (NuGet packages)
-
Python (pip,
setup.py,requirements.txt) - Ruby (Bundler)
- Swift and CocoaPods (iOS development)
You can find the full list of supported analyzers referenced in the official OWASP Dependency-Check documentation, which the project maintainers update as new analyzers are added and ecosystems evolve.
What Dependency-Check does not do
This is where many teams run into trouble expecting too much. Dependency-Check does not analyze your own source code for security flaws. If you introduce a SQL injection vulnerability or an insecure deserialization pattern in your custom code, this tool will not catch it. You need a static application security testing (SAST) tool for that layer of analysis, and the two tools complement each other rather than overlap.
The tool also does not guarantee that every flagged vulnerability is actually exploitable in your specific context. A library might contain a CVE tied to a feature your application never calls, but Dependency-Check will still report it because it works at the dependency level, not the code-path level. This produces false positives that you'll need to manage through suppression rules, which this guide covers in a dedicated step.
Additionally, Dependency-Check does not block attacks in real time. It is a scanning and reporting tool, not a runtime protection layer. Running it regularly in your CI/CD pipeline catches vulnerable components before deployment, but you still need proper network controls, input validation, and runtime monitoring for a complete security posture.
| Capability | Dependency-Check | SAST Tool | Runtime Protection |
|---|---|---|---|
| Scans third-party libraries | Yes | Partial | No |
| Analyzes your custom code | No | Yes | No |
| Blocks live exploits | No | No | Yes |
| Reports known CVEs | Yes | No | Partial |
Prerequisites and planning checklist
Before you install anything, confirm that your environment meets the minimum requirements and that you have the information Dependency-Check needs to function correctly. Skipping this step leads to failed scans, missing vulnerability data, or misleading reports that waste more time than they save. Running through this checklist once upfront keeps the actual setup clean and predictable.
System and runtime requirements
Dependency-Check is built on Java, so the Java Runtime Environment (JRE) or Java Development Kit (JDK) version 8 or higher must be installed on the machine running scans. You can verify this by opening a terminal and running java -version. If Java is not installed or is below version 8, install the appropriate version for your operating system before continuing.
The OWASP Dependency-Check documentation specifically notes that Java 8 is the minimum supported version, but running a current LTS release like Java 17 or 21 is a safer long-term choice.
Beyond Java, your environment needs reliable internet access for the initial NVD data download, which can be several hundred megabytes. On air-gapped or restricted networks, you'll need to pre-download the data files or mirror the NVD feed, which adds complexity covered in the data sources step later in this guide.
What to gather before you start
Dependency-Check pulls vulnerability data from the NVD API, and as of late 2023, NIST requires an API key to avoid strict rate limiting. Without a key, large scans can time out mid-download, leaving your local vulnerability database incomplete. Register for a free NVD API key at the NIST NVD developer portal before you run your first scan so you don't hit this wall unexpectedly.
You also need to know which package ecosystems your project uses before you pick an install method. A pure Java Maven project has different integration options than a Node.js application or a mixed Python-and-Java monorepo. Take five minutes to list every package manifest file in your repository, such as pom.xml, package-lock.json, requirements.txt, or *.csproj. This list directly informs which analyzers to enable and which to disable, which keeps scan times reasonable and reports focused on what actually matters to your project.
Step 1. Choose your install method
Dependency-Check offers four primary installation paths: the standalone command-line tool, the Maven plugin, the Gradle plugin, and the Jenkins plugin. Each method produces the same core output, but the right choice depends on how your team builds software and where you want scans to run. Pick the method that fits your existing workflow so scanning becomes a natural step rather than a separate manual task.
Command-Line Tool
The standalone CLI is the most flexible option and the best starting point if you want to scan any project type without modifying build files. Download the latest release archive from the official OWASP Dependency-Check GitHub releases page, extract it, and add the bin directory to your system PATH. You can then run scans against any directory on your machine.
The OWASP Dependency-Check documentation recommends verifying the SHA-256 checksum of your downloaded archive before extracting it, which takes thirty seconds and confirms the file was not tampered with in transit.
Once installed, a basic CLI scan looks like this:
dependency-check.sh \
  --project "MyProject" \
  --scan ./path/to/project \
  --nvdApiKey YOUR_API_KEY_HERE \
  --out ./reports
On Windows, replace dependency-check.sh with dependency-check.bat. The --scan flag accepts a directory or individual file path, and --out sets where the HTML and XML reports are written.
Maven and Gradle Plugins
If your project already uses Maven or Gradle, integrating Dependency-Check directly into your build is cleaner than maintaining a separate CLI installation. For Maven, add the plugin to the <build><plugins> section of your pom.xml:
<plugin>
  <groupId>org.owasp</groupId>
  <artifactId>dependency-check-maven</artifactId>
  <version>9.0.9</version>
  <configuration>
    <nvdApiKey>${nvd.api.key}</nvdApiKey>
  </configuration>
</plugin>
Run the scan with mvn dependency-check:check. For Gradle, apply the plugin in your build.gradle file with id 'org.owasp.dependencycheck' version '9.0.9' in the plugins block, then run gradle dependencyCheckAnalyze. Both approaches pull the NVD API key from an environment variable or property file rather than hardcoding it, which keeps credentials out of version control.
Step 2. Run your first scan and read reports
With your install method chosen and your NVD API key ready, you can run your first scan. The command below uses the CLI, but the report structure and output format are identical regardless of whether you run through the CLI, Maven, or Gradle. Execute this from your project root:
dependency-check.sh \
  --project "MyFinTechApp" \
  --scan . \
  --nvdApiKey YOUR_API_KEY_HERE \
  --format HTML \
  --format JSON \
  --out ./reports
The --format flag accepts multiple values, so specifying both HTML and JSON gives you a human-readable report for manual review alongside a machine-parseable file for automated processing later in your CI pipeline. Your first scan runs noticeably slower than subsequent ones because Dependency-Check downloads and caches the full NVD database locally during that initial run.
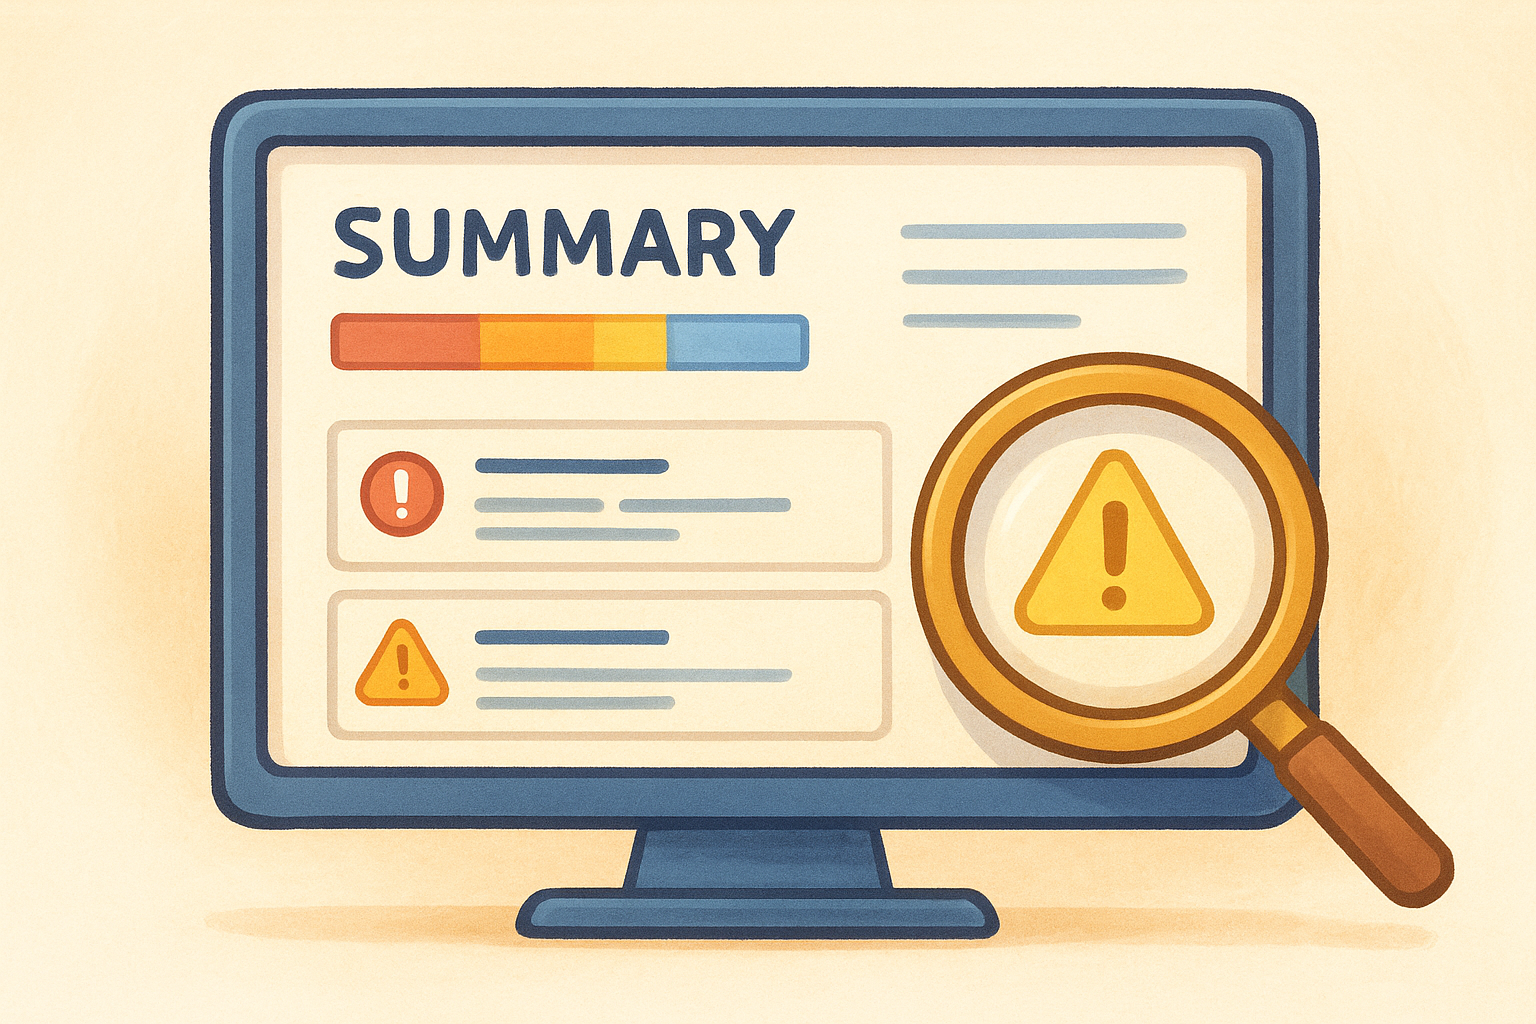
Understanding the report output
Once the scan finishes, open the HTML report from your ./reports directory in a browser. The top of the report displays a summary of every dependency scanned and a vulnerability count broken down by severity level. Each dependency entry expands to show which CVEs were matched, the affected version range, and a plain-English description of what the vulnerability enables an attacker to do.
The OWASP Dependency-Check documentation notes that a dependency appearing in the report does not automatically mean your application is exploitable; it means that specific library version has at least one known CVE recorded in the NVD.
Pay close attention to the evidence section for each flagged dependency. That section shows the exact file paths, manifest entries, or JAR attributes the tool used to identify the library and confirm its version. If the evidence references a wrong version number, that mismatch is a strong indicator the finding is a false positive you should address through a suppression rule rather than a code change.
Interpreting CVE severity scores
Each CVE in the report carries a CVSS score between 0.0 and 10.0, where scores above 7.0 fall into the High or Critical range and deserve your immediate attention. The report also includes the attack vector field, which tells you whether exploitation requires network access, local access, or physical machine access. Prioritize CVEs with a network attack vector first, since those are the ones a remote attacker can reach without any foothold on your infrastructure.
Step 3. Configure data sources and API keys
By default, Dependency-Check fetches vulnerability data directly from the NVD API maintained by NIST. Without proper configuration, your scans will either hit rate limits or pull incomplete data, both of which produce unreliable reports. Configuring your data sources correctly takes about ten minutes and makes every subsequent scan faster and more accurate.
Set Your NVD API Key in Configuration
You can pass your NVD API key as a command-line argument every time you run a scan, but a cleaner approach is to define it once in a properties file that Dependency-Check loads automatically. Create a file called dependency-check.properties in your project root or in a shared config directory your team controls:
# dependency-check.properties
nvd.api.key=YOUR_NVD_API_KEY_HERE
nvd.api.delay=6000
The nvd.api.delay setting controls the millisecond pause between NVD API requests, which helps you stay within the rate limits even during large scans. NIST's free API tier allows roughly 50 requests per 30 seconds, and a 6,000-millisecond delay keeps you safely inside that window. Reference this file in your CLI scan with the --propertyfile flag:
dependency-check.sh \
  --project "MyFinTechApp" \
  --scan . \
  --propertyfile ./dependency-check.properties \
  --out ./reports
Never commit your actual NVD API key to version control. Inject it as an environment variable in CI and reference it in your properties file as
${NVD_API_KEY}to keep credentials out of your repository history.
Handle Restricted or Air-Gapped Networks
Some fintech environments block direct outbound connections to external APIs for compliance reasons. The OWASP Dependency-Check documentation covers an offline mode where you pre-download the NVD data files and point the tool at a local or mirrored data directory instead of the live API.
To enable offline mode, download the NVD JSON feeds separately on a connected machine, store them on an internal file server or artifact repository, and set the following properties:
data.directory=/path/to/local/nvd-data
nvd.datafeed.url=https://your-internal-mirror.example.com/nvd/feeds/
Your local data directory needs regular scheduled updates, at least weekly, to keep the vulnerability database current. Stale data is one of the most common reasons teams miss newly disclosed CVEs, so treat the mirror update job with the same priority as the scan itself.
Step 4. Reduce noise with suppressions
After your first scan, you'll likely see CVEs that don't apply to your specific application. A flagged library might contain a vulnerability in a module your code never calls, or the tool might incorrectly identify a dependency version entirely. These false positives clutter your report and train your team to ignore findings, which is one of the fastest ways to miss a real threat hiding among the noise.
How Suppression Files Work
Dependency-Check uses an XML-formatted suppression file to filter out known false positives from future scan reports. When you mark a CVE as suppressed, the tool still detects the match but excludes it from the active findings list, keeping your reports clean without deleting vulnerability data or altering your dependencies.
The OWASP Dependency-Check documentation describes two suppression strategies: suppressing by CVE identifier alone, which applies globally across all dependencies, and suppressing by a specific dependency file path combined with a CVE, which is far safer and more precise. Use the second approach whenever possible to avoid accidentally hiding a real vulnerability in a different library that shares the same CVE ID.
Suppressing by CVE ID alone is risky because the same CVE can apply to multiple libraries across your dependency tree.
Writing a Suppression Rule
Create a file called suppressions.xml in your project root and reference it during scans with the --suppression flag. The template below covers the two most common use cases your team will encounter:
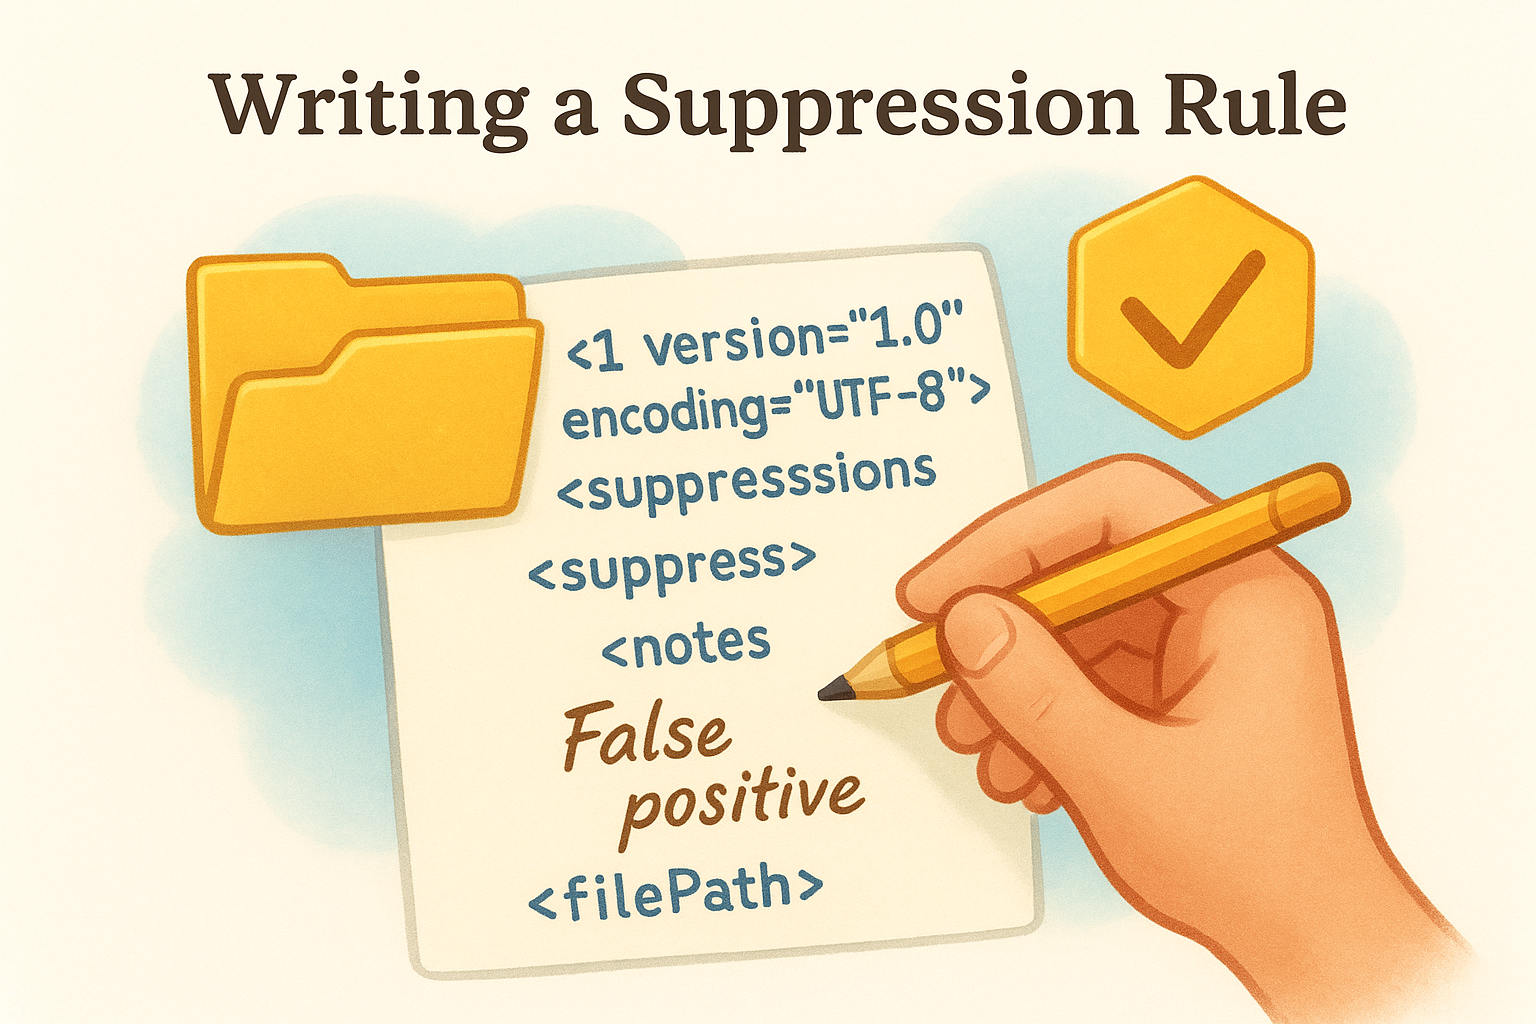
<?xml version="1.0" encoding="UTF-8"?>
<suppressions xmlns="https://jeremylong.github.io/DependencyCheck/dependency-suppression.1.3.xsd">

  <!-- Suppress a specific CVE for one dependency only -->
  <suppress>
    <notes>False positive: app does not use the affected JNDI lookup feature.</notes>
    <filePath regex="true">.*log4j-core-2\.17\..*\.jar</filePath>
    <cve>CVE-2021-44228</cve>
  </suppress>

  <!-- Suppress by CPE if the version is misidentified -->
  <suppress>
    <notes>Version mismatch: tool incorrectly identifies this as an older release.</notes>
    <filePath regex="true">.*jackson-databind-2\.15\..*\.jar</filePath>
    <cpe>cpe:/a:fasterxml:jackson-databind:2.9.0</cpe>
  </suppress>

</suppressions>
Pass the file into your CLI command with --suppression ./suppressions.xml alongside your other flags. For Maven and Gradle, add a <suppressionFile> element inside the plugin's <configuration> block pointing to the same file path.
The <notes> field inside each suppression rule matters more than it looks. Recording your reason for each suppression gives your team a clear audit trail and makes it obvious whether the suppression is still valid six months later when that library ships an update.
Step 5. Automate in CI and fail builds safely
Running Dependency-Check manually is useful during initial setup, but the real protection comes from integrating it into your CI/CD pipeline so every code push triggers a scan automatically. Automating at this layer means vulnerable dependencies get caught before they reach production, not after a deployment that could have been blocked in thirty seconds.
Set a CVSS Failure Threshold
Dependency-Check supports a --failOnCVSS flag that tells the build to exit with a non-zero code when any finding meets or exceeds the CVSS score you specify. A score of 7 is the standard starting threshold for High severity, but many fintech security teams set it to 4 to catch Medium-severity findings as well. Start with 7, review your first few blocked builds, and tighten the threshold once your team has processed the backlog of existing findings.
Setting your threshold at 10 to avoid blocking builds entirely defeats the purpose of automating the scan in the first place.
Using a threshold alongside a suppression file from Step 4 keeps the failure signal meaningful. Without suppressions, known false positives will block every build, and developers will route around the check by disabling it rather than fixing real issues.
GitHub Actions Integration
GitHub Actions is one of the most common CI platforms in fintech development, and the following workflow file gives you a working integration you can drop directly into your repository under .github/workflows/dependency-check.yml:
name: Dependency-Check Scan

on:
  push:
    branches: [main, develop]
  pull_request:

jobs:
  dependency-check:
    runs-on: ubuntu-latest
    steps:
      - uses: actions/checkout@v4

      - name: Run OWASP Dependency-Check
        run: |
          wget -q https://github.com/jeremylong/DependencyCheck/releases/download/v9.0.9/dependency-check-9.0.9-release.zip
          unzip -q dependency-check-9.0.9-release.zip
          ./dependency-check/bin/dependency-check.sh \
            --project "${{ github.repository }}" \
            --scan . \
            --nvdApiKey "${{ secrets.NVD_API_KEY }}" \
            --failOnCVSS 7 \
            --suppression ./suppressions.xml \
            --format HTML \
            --out ./reports

      - name: Upload Report
        uses: actions/upload-artifact@v4
        if: always()
        with:
          name: dependency-check-report
          path: ./reports/
Store your NVD API key as an encrypted Actions secret named NVD_API_KEY rather than pasting it into the workflow file. The if: always() condition on the upload step ensures the HTML report is available for review even when the build fails, which is exactly when your team needs it most. This is the workflow pattern recommended by the OWASP Dependency-Check documentation for teams running automated scanning in version-controlled pipelines.
Next steps
You now have everything you need to move from zero to a fully automated Dependency-Check pipeline. You have installed the tool, run your first scan, configured your NVD API key, reduced false positives with a suppression file, and wired the whole process into CI so vulnerable dependencies get caught automatically on every push. Revisit the OWASP Dependency-Check documentation periodically because the maintainers add new analyzers and change default behaviors between major releases, and staying current keeps your scans accurate.
From here, consider pairing Dependency-Check with a SAST tool to cover vulnerabilities in your own code alongside third-party libraries. Your NVD data cache also needs a regular refresh schedule, so add a weekly update job to your CI infrastructure before you consider this setup complete. Security in software development and in crypto self-custody follows the same principle: layers of protection matter more than any single tool. If you want to strengthen your broader crypto security knowledge, start with the FinTech Dynasty crypto education course.