

Electrum Coin Control: How To Spend Specific UTXOs Safely
Every time you send Bitcoin from a wallet, the software decides which coins (UTXOs) to spend on your behalf. Most users never question that default behavior, but if you care about privacy or want tighter control over fees, Electrum coin control changes the game. It lets you manually select which UTXOs fund a transaction, giving you direct say over what gets spent and what stays put.
This matters more than most people realize. Sending from the wrong UTXO can link addresses you'd rather keep separate, or it can pull in larger inputs than necessary, resulting in higher fees for no good reason. For anyone practicing self-custody, the core of what we cover here at FinTech Dynasty, understanding coin control is a practical security skill, not just a power-user trick.
In this guide, you'll learn exactly how to enable and use coin control in Electrum step by step. We'll cover how to identify and select specific UTXOs, freeze coins you don't want touched, and avoid common mistakes that could compromise your privacy or cost you sats.
What coin control is and when to use it
Bitcoin doesn't work like a bank balance. Your wallet holds a collection of unspent transaction outputs (UTXOs), each one a discrete chunk of bitcoin with its own transaction history attached. When you send a payment, Electrum picks which UTXOs to spend automatically. Coin control is the feature that overrides that default behavior and puts the selection directly in your hands.
Combining UTXOs from different sources in a single transaction creates a permanent, on-chain link between those sources that anyone can inspect.
When coin control matters
Two main situations call for using Electrum coin control: privacy protection and fee optimization. From a privacy standpoint, each UTXO carries the history of where it came from. If you received bitcoin from a KYC exchange and separately from a peer-to-peer trade, combining both inputs in one transaction signals to any on-chain observer that the same entity controls both sources. Keeping those UTXOs separate prevents that link from ever forming.
Fee control is the second strong reason. Electrum's default coin selection algorithm sometimes bundles several small UTXOs together to cover a payment, which inflates the transaction's byte size and drives up the fee. Manually picking one UTXO that covers what you need keeps the transaction small and the fee proportionate.
What a UTXO looks like in practice
Think of each UTXO as a physical bill in your wallet. If you hold three UTXOs worth 0.01 BTC, 0.05 BTC, and 0.1 BTC, your total balance shows as 0.16 BTC, but those are three separate coins. Without coin control, Electrum may spend multiple bills at once. With it, you choose exactly which coin leaves your wallet, leaving the rest untouched and unlinked. Here is how common UTXO sources compare from a privacy standpoint:
| UTXO Source | Privacy Risk if Mixed | Best Practice |
|---|---|---|
| KYC exchange withdrawal | High: ties your identity to the spend | Keep isolated in its own label |
| Peer-to-peer trade | Medium: unknown counterparty history | Spend separately from KYC coins |
| Mining reward or coinbase | Low: clean origin | Can consolidate with similar sources |
| Change output from prior spend | Medium: links back to previous transaction | Review before reuse |
Step 1. Enable coin control in Electrum
Coin control is hidden behind a setting that Electrum keeps off by default. You need to activate it manually before any UTXO selection options appear in the interface. The process takes under a minute and you only need to complete this setup once per wallet.
Once enabled, the coin control setting persists across sessions, so you won't need to repeat this step every time you open Electrum.
Turn on the Coins tab
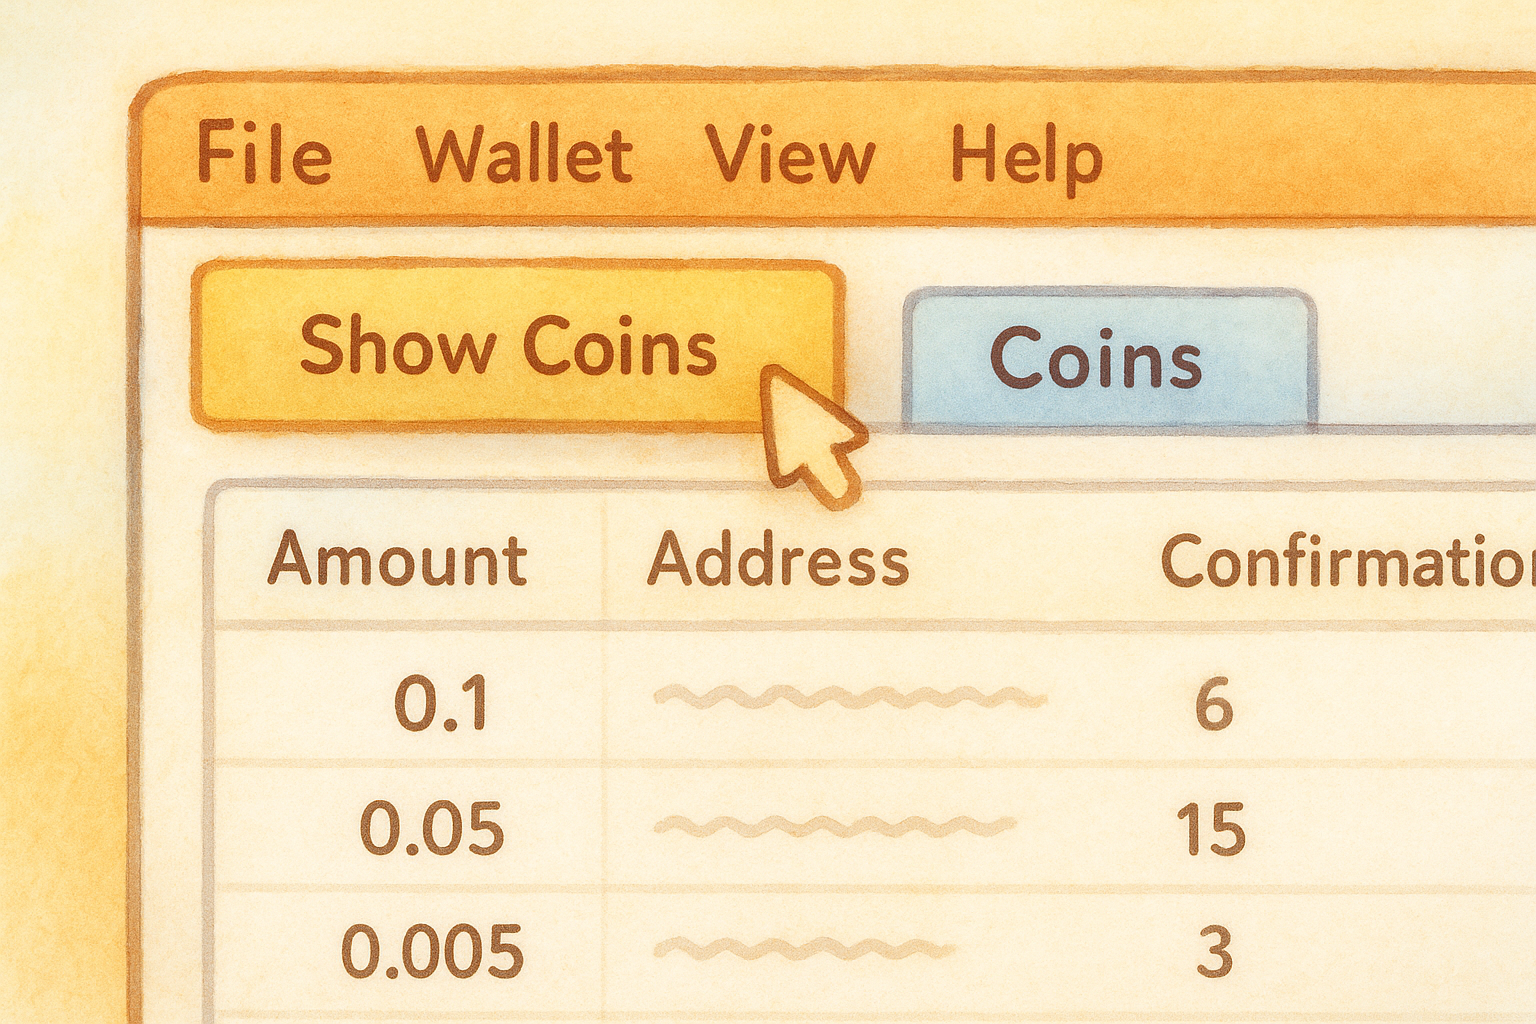
Open Electrum and navigate to the top menu bar. Click View, then select "Show Coins" from the dropdown. This adds a dedicated Coins tab to your wallet interface, where every individual UTXO in your wallet appears as a separate, selectable row.
Verify the feature is active
With the Coins tab now visible, click on it and confirm you can see individual UTXOs listed with their amounts, addresses, and confirmation counts. If your wallet holds multiple coins, each one appears on its own line. At this point, Electrum coin control is fully active and ready to use in the next step when you build a transaction.
Step 2. Pick UTXOs and avoid unwanted links
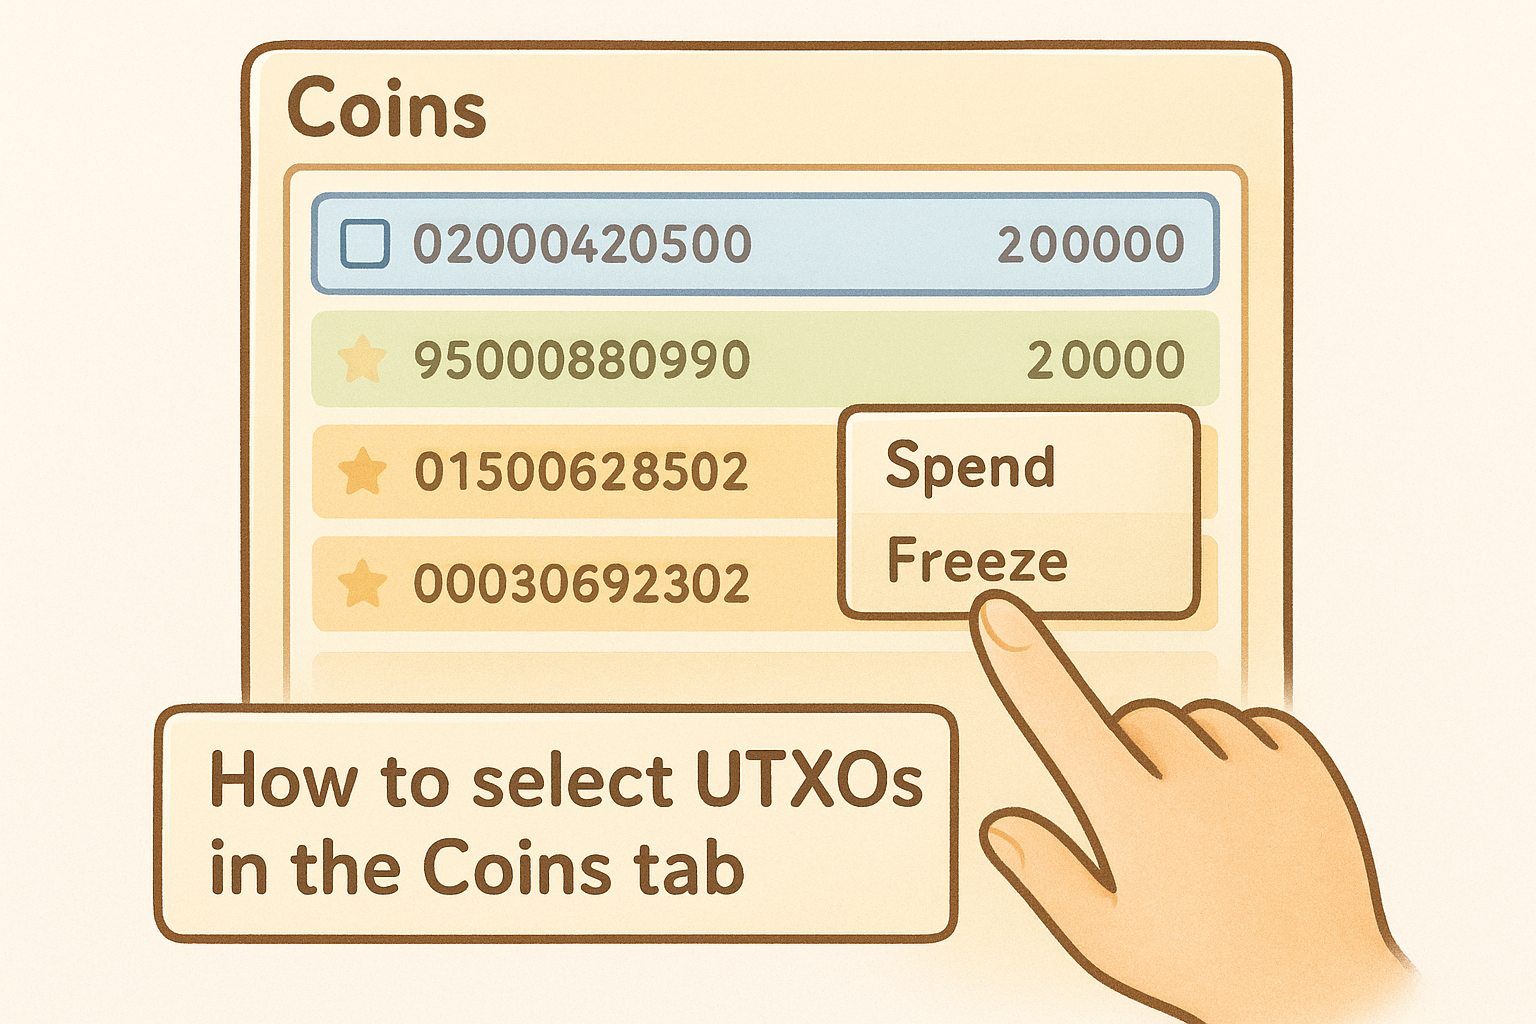
With the Coins tab open, you're ready to start the actual selection process. Right-click on any UTXO you want to spend and choose "Spend" from the context menu. Electrum coin control will mark that coin as the selected input for your next transaction, highlighted in the interface so you can confirm your choice before moving forward.
How to select UTXOs in the Coins tab
To select multiple UTXOs at once, hold Ctrl (Windows/Linux) or Command (Mac) and click each coin you want to include. Once you have your inputs confirmed, right-click and choose "Spend" to lock them in. Electrum routes you directly to the Send tab with those specific inputs pre-loaded, so nothing outside your selection gets pulled into the transaction.
Never mix UTXOs from different sources in one transaction unless you have a clear, intentional reason to link those addresses on-chain permanently.
Freeze coins you want to protect
If you have UTXOs you never want accidentally spent, right-click the coin in the Coins tab and select "Freeze." Frozen coins appear grayed out, and Electrum will skip them entirely during both automatic and manual coin selection. This protection is especially useful for UTXOs tied to KYC exchange withdrawals that you want to keep permanently isolated from your other funds.
Step 3. Control change, outputs, and fees
After you lock in your inputs, Electrum coin control extends to the output side of the transaction. You need to think carefully about the change output, which is the leftover bitcoin that returns to your wallet after subtracting the payment amount and the fee. That change lands somewhere, and where it lands matters for both privacy and future coin management.
Set a custom change address
By default, Electrum routes change to a freshly generated address in your wallet automatically. You can override this by opening Tools > Preferences > Transactions and enabling the option to specify a change address manually. Sending change to a dedicated, labeled address keeps your UTXO set organized and prevents unintended address reuse.
Reusing a change address across multiple transactions makes it straightforward for on-chain observers to cluster your wallet activity over time.
Adjust the fee rate manually
Electrum sets fees based on current network conditions, but you control the final sat/vByte rate directly from the Send tab using the fee slider. For non-urgent transactions during low-congestion periods, dropping to 1 to 2 sat/vByte can meaningfully reduce costs, especially when your selected UTXO covers the payment cleanly and produces minimal change.
Step 4. Preview, sign, and broadcast
Before you finalize any transaction, Electrum coin control gives you one more checkpoint: the transaction preview screen. This screen displays every detail of what you're about to send, including the inputs you selected, the destination address, the change output, and the total fee. Read through each field carefully before you commit.
If any input, address, or fee figure looks wrong at the preview stage, click "Cancel" and adjust, because reversing a broadcast Bitcoin transaction is not possible.
Check the transaction details
The preview window lists your selected inputs and outputs in full. Verify that the sending addresses match the UTXOs you picked in the Coins tab, and confirm the destination address is correct character by character. Run through this checklist before proceeding:
- Inputs: Match the UTXOs you selected in the Coins tab
- Destination: Correct address, verified in full
- Change output: Routes to your intended address
- Fee rate: Matches the sat/vByte rate you set
Sign and push to the network
Once everything checks out, click "Send" and enter your wallet password to sign the transaction locally on your device. Electrum then broadcasts the signed transaction to the Bitcoin network automatically. You can track confirmation progress in the History tab, where the transaction appears immediately with a pending status until miners include it in a block.
Wrap-up and Safe Habits
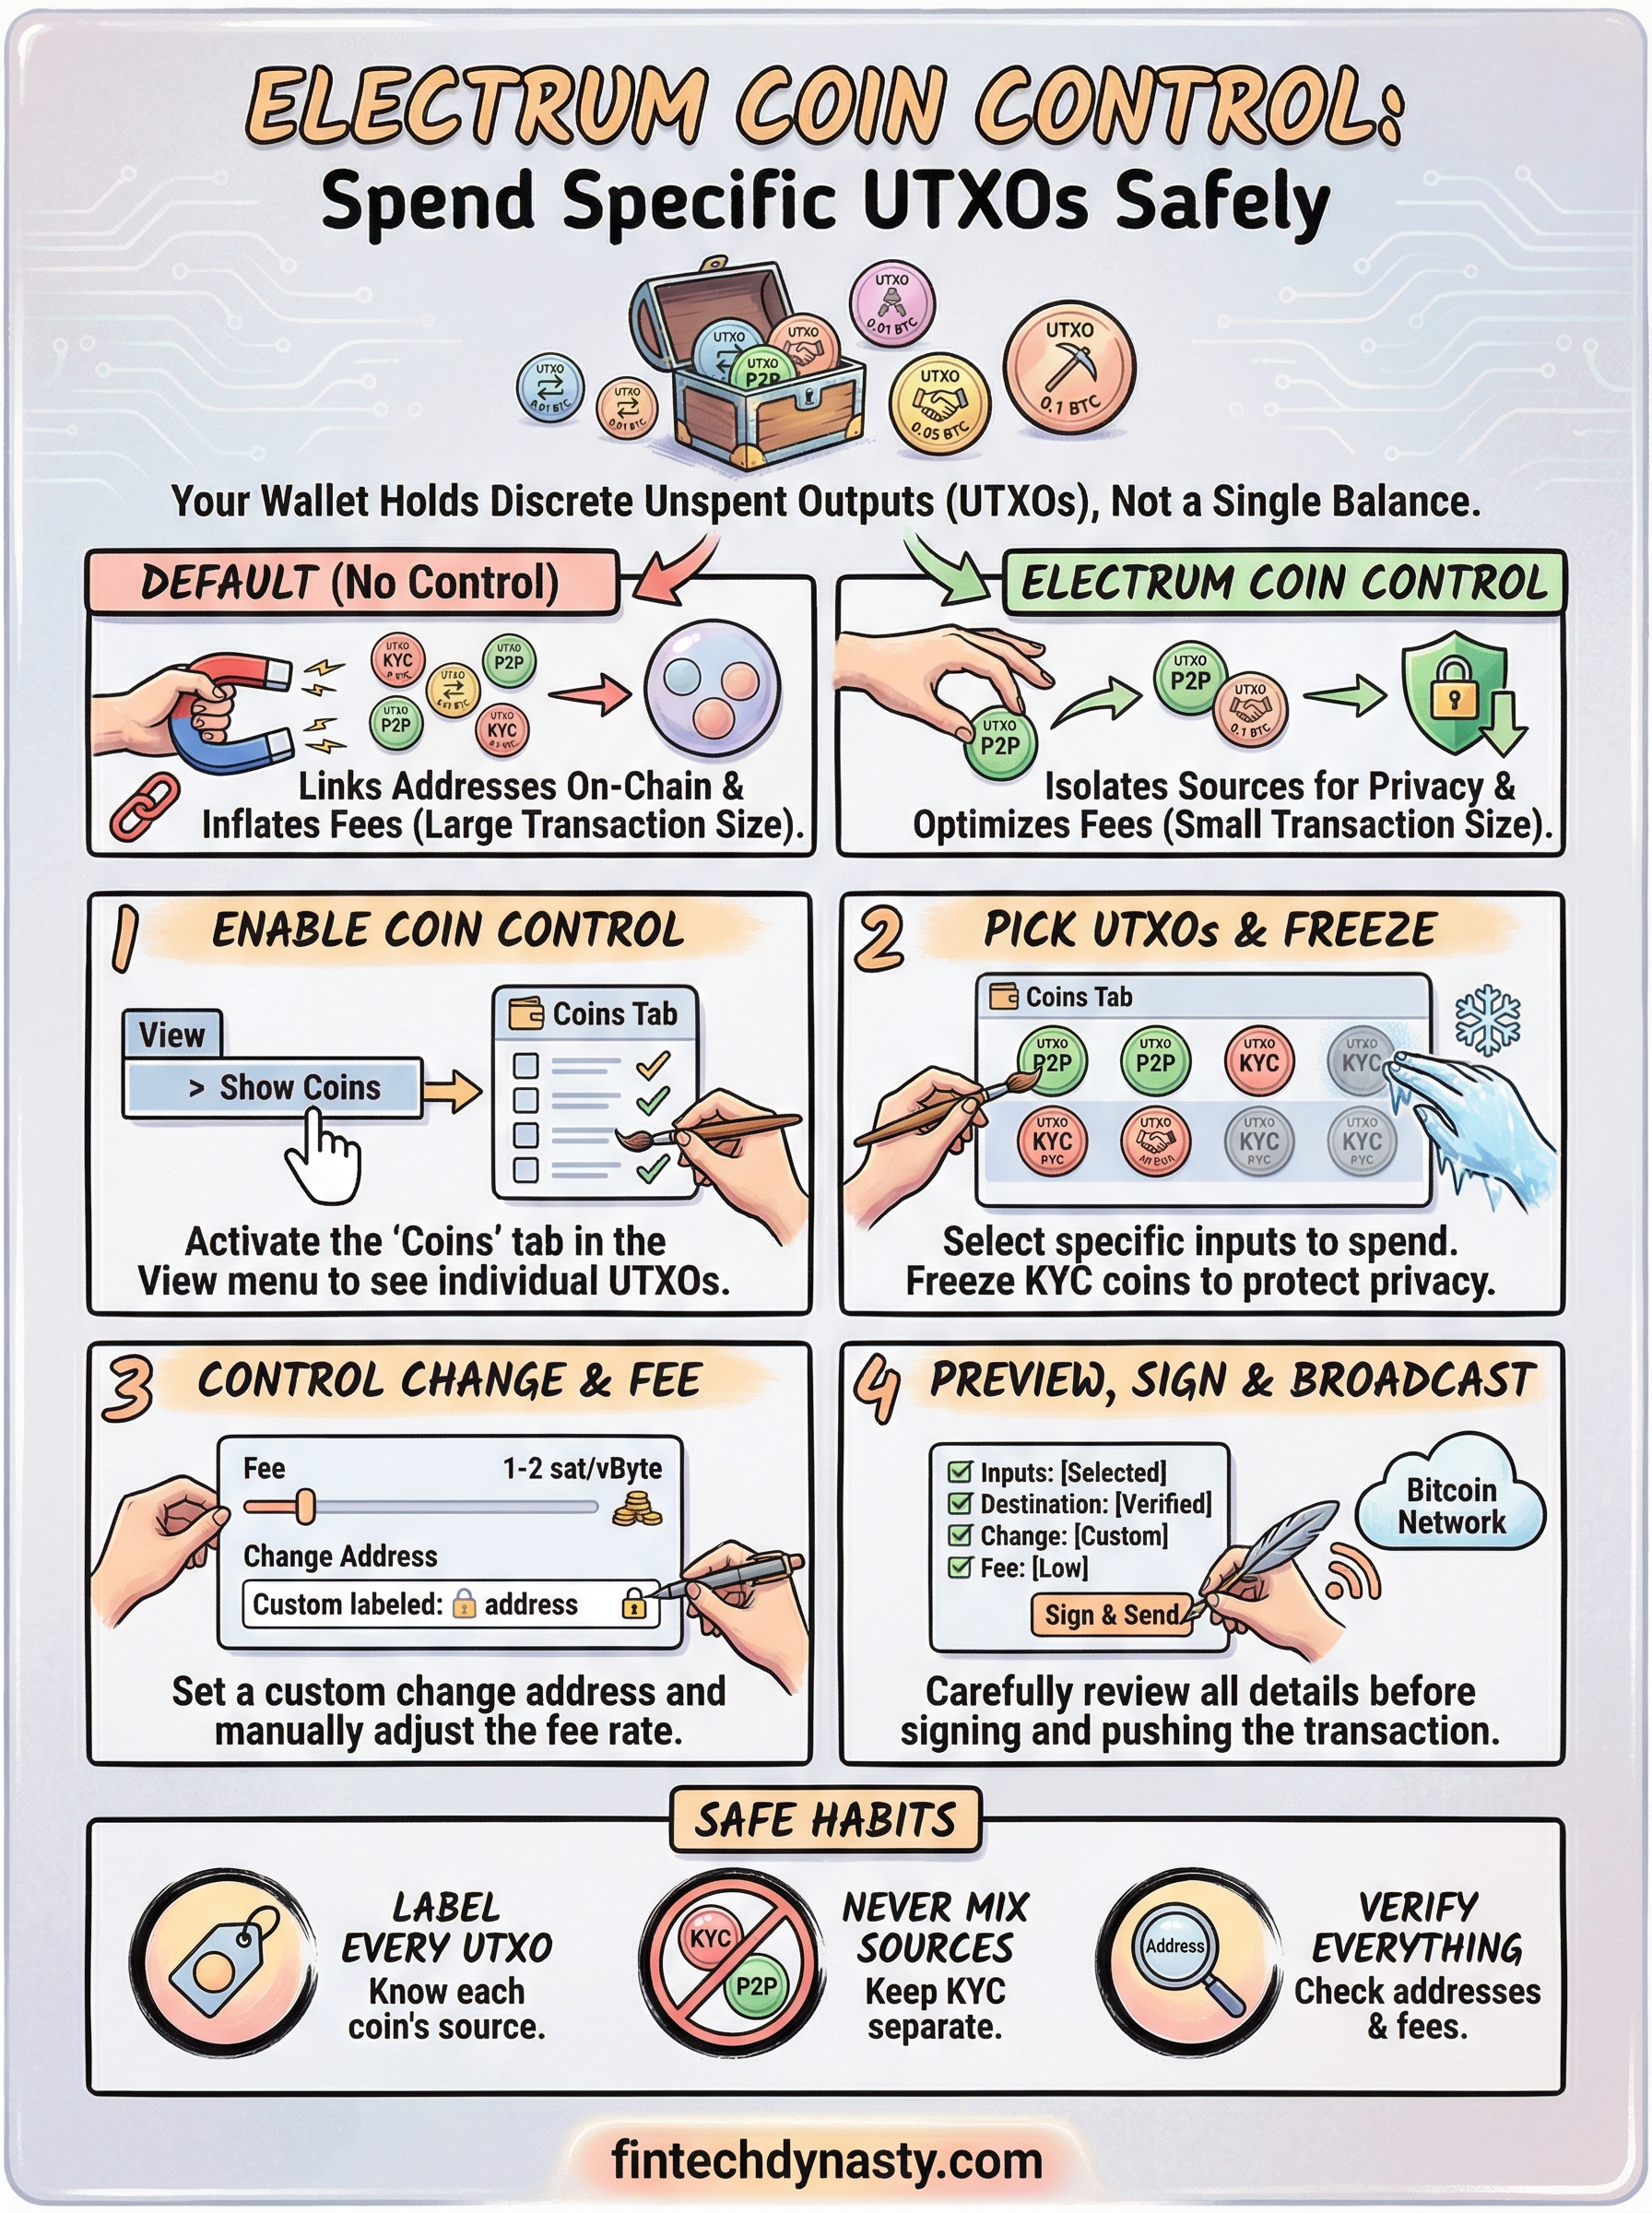
Using electrum coin control gives you direct authority over which UTXOs fund each transaction, and that authority is only as strong as the habits you build around it. Label every UTXO when it arrives so you always know its source. Freeze any coin tied to identity-linked sources before you forget its origin, and review your change address settings before each send session rather than assuming the defaults serve your goals.
A few consistent rules keep your UTXO hygiene solid over time: never combine KYC and non-KYC inputs, always verify the full destination address character by character at the preview stage, and set a deliberate fee rate rather than leaving it on auto. These steps take seconds but prevent on-chain mistakes that cannot be undone.
If you want to build a stronger foundation in Bitcoin security and self-custody, start with the FinTech Dynasty crypto course for structured, practical lessons that take you from the basics to confident, independent ownership of your assets.